Monday, January 30, 2012

Mom's Sugar Cookies


These are the sugar cookies my mom made most often.  We had them EVERY Christmas and just in general when we wanted cookies.  I love these.  They are easy!  They use simple ingredients that I most generally always have in my pantry.  They use oil instead of butter or margarine.  The dough doesn't have to be chilled and they are dropped with a spoon.  Couldn't be any easier!  They can be sprinkled with whatever colored sugar celebrates a certain holiday or birthday and they pretty much taste fantabulous!  They are puffy little crunchy yet moist cookies and I think they're perfect.


Here's how we make Mom's Sugar Cookies AT HOME MY WAY:


Mom's Sugar Cookies

  • 2 eggs, slightly beaten
  • 2/3 cup oil (I use canola or vegetable)
  • 2 teaspoons vanilla
  • 3/4 cup sugar
  • 2 teaspoons baking powder
  • 1/2 teaspoon salt
  • 2 cups all purpose flour
  • Colored sugar for sprinkling
In a med mixing bowl, slightly beat the eggs.  Add in the sugar and oil.  Stir until well combined.  Add the vanilla.  Stir again.  Add the baking powder and salt.  Blend well.  Lastly, add the flour and stir well.

Drop onto sprayed or lightly oiled cookie sheet.  Using a sprayed/oil glass press the cookies down or I just usually flatten a little bit with my hands.  Don't flatten too thin.  Just flatten like fat little cookies.  Sprinkle with colored sugar.

Bake @ 350 ° for 12 minutes.  Cool, then remove to cooling racks.

Here's a closeup.  I was running out of red sugar and there is some stray green sugar here and there but you should taste them!  YUM!

Thursday, January 26, 2012

Hamburger Soup

I think I posted this recipe one cool rainy day this past summer, but since I promised to post this recipe which I used in Last Night's Leftovers to create Super Soup & Noodles, I figured it couldn't hurt to post this again.  HANDS DOWN, this is our favorite vegetable soup recipe.  Over the weekend I made it without the macaroni.  I just used more potatoes.  If you do serve with pasta, keep the pasta separate as the pasta breaks down and becomes mushy when you eat this leftover.  This recipe is very garlic-y.  This was the first vegetable soup my kids would eat since it was similar to spaghetti and they could eat the broth/meat & pasta, until they got used to the vegetables.  Sometimes I either buy or make bread bowls to ladle this soup into.  Its really, really good!

Don't forget that this soup is great for leftovers - ladled over wide egg noodles or rice!

This is how I make Hamburger Soup AT HOME MY WAY:
(NOTE: remove the bay leaves BEFORE serving!) (DO NOT EAT BAY LEAVES)
  • 1 to 2 pounds hamburger (we use a little more than 1 pound)
  • 1 can crushed tomatoes + 1-8oz can tomato sauce (plus each empty cans filled with water) (OR if you don't have crushed tomatoes, which we did not last night, THEN USE 2 -8oz cans of tomato sauce + 2 cans of water)
  • 1 can carrots (undrained)
  • 3-5 med. potatoes (peeled and chopped)
  • 1 can green beans (undrained)
  • 1 small can mushrooms (stems & pieces) undrained  (optional)
  • 1 Tablespoon onion powder
  • 1 Tablespoons garlic powder
  • 1/2 teaspoon basil or oregano
  • 2 bay leaves (large ones so you can find them)
  • 1 teaspoon salt
  • 1 teaspoon pepper
  • 1 1/2 cup additional water
  • EXTRA INGREDIENT: Cook 2 cups macaroni and serve with the soup. (If you put it in the pot, it gets mushy so we keep it separate and just add to each of our bowls.)


Brown hamburger in a soup pot with the onion powder, or if using real onion, brown with the meat until all clear. Drain. Add all remaining ingredients, including the cans of water and extra water. Crack the lid and simmer, stirring occasionally at least 45 minutes or longer or until potatoes are soft.


REMOVE THE BAY LEAVES and serve.


Serve with cooked elbow macaroni and/or in bread bowls! Yummy!


Wednesday, January 25, 2012

Last Night's Leftovers - Super Soup & Noodles

One of my favorite bloggers at The Tasty Cheapskate (she had me at the title of her blog), did a post on re-using leftovers to create dinner.  She comments about a show the Food Network did on large scale wasting of food.  Jeanie noted that she would like to see a show on the Food Network where the chefs take everyday leftovers and create something wonderful.  I agree!  I actually love the Food Network.  But, definitely a show featuring down to earth solutions to every day problems (feeding the family with food in the fridge) would be a great for people like us.

Jeanie posted on Leftover Tuesday how she took some spaghetti sauce, bacon, cream, and spaghetti pasta to created supper (Baked Spaghetti) for her family.  It looked super yummy!  I think our mothers and grandmothers have always recreated with what they had to put food on the table.  I remember my mom making many a "rice pie" with leftover rice in the fridge, which was a baked rice pudding that we ate for dessert.  However, I do think this could become a lost art with our generation's reliance on processed, premade foods. 

I decided to join in and see what I could come up with to create supper with some leftovers I had in my fridge.  Now, my pictures are not wonderful.  The lighting was bad in my kitchen last night.  Its so dark when I get home, but if I turn on all the lights, the pictures are worse.  But, you can at least see that it looks yummy and it WAS!

My inspiration was found in one of those ads for Chunky canned soup.  You know the ones where the guy dumps his soup over noodles or rice to create a meal?  Well, I had some soup (my favorite garlic-y hamburger soup, which I will post the recipe for tomorrow) and I had some wide egg noodles.  So, dinner was served!  It tasted like a combination of pepper steak / vegetable soup.  This meal was very satisfying and I will certainly serve this again.  Leftover noodles will never again go to waste in my fridge.  And, since I grew up in the south and biscuits were every day fare, one of my favorite "sides" is toasted leftover biscuits.  They are just so crunchy and buttery.  Yum!  I had alot on my plate already, but who could resist those little crunchy babies!  Mmmmmm mmmm good!

Here's how I made Last Night's Leftovers (Super Soup & Noodles) AT HOME MY WAY:

Here are the has-beens:

Note that I've already taken leftovers out of this dish.  Just a little bit was left.  It might have gone to waste if I hadn't seen post at The Tasty Cheapskate!

A little bit of wide egg noodles were left from Monday night's David Letterman's Chicken.

I usually always have some leftover biscuits.  These were from Monday night.  The recipe is here.


Ta-da!  The feast!

One more pic to show the toasty biscuits.  I just split them, butter them, and place in the broiler until toasty!

Tuesday, January 24, 2012

David Letterman Chicken (Crockpot Recipe)

Last night I made a meal in the crockpot that I hadn't made for years!  I think I had forgotten about it.  It was delicious and I need to remember this one.  It would also be great to serve to company.  It was easy to throw in the crockpot before work and everyone loved it!  I remember that this recipe was originally called "David Letterman chicken".  Supposedly, David Letterman's Mom used to make this for him.  I have no idea if that is true or not, but I made it for my family and we all liked it.  That's all I need to know LOL.


This is how I made "David Letterman Chicken" AT HOME MY WAY:


David Letterman Chicken (crockpot)

  • 4-8 boneless, thawed skinless chicken breasts (or whatever you like to use as far as chicken goes, bone-in, dark meat, whatever..)
  • Bacon (a piece of bacon for each piece of chicken)
  • 1 can cream of mushroom soup
  • 1 cup sour cream
  • Salt/Pepper
  • Egg noodles, mashed potatoes or rice (I prefer wide egg noodles)
Directions: 

Wrap each piece of chicken with a piece of bacon.  Lay the pieces of wrapped chicken in your crockpot.  In a small bowl, combine the cream of mushroom soup with the sour cream, stirring well to combine.  Pour over the chicken in the crockpot.  Salt & pepper a little bit to your liking.  Cover with the lid.

Turn on low and cook 8-10 hours.  Serve over wide egg noodles, mashed potatoes or rice. 

Monday, January 23, 2012

Chocolate Chip Baked Oatmeal

Does Chocolate Chip Baked Oatmeal sound like a strange combination to you?  I'm sure the title sounds a little odd.  But this version of Baked Oatmeal is really luscious.  "Luscious?"  "Oatmeal?" you might ask.  Yep!  It was warm and gooey and tasted just like a hot oatmeal/chocolate chip cookie fresh from the oven!  This breakfast would be a great way to introduce oatmeal to your children.  If they like chocolate chip granola bars (specifically the chewy ones) or oatmeal cookies, they are going to love this!  This recipe is also very cheap to make and uses ingredients found in your pantry!  I love that about it.  I also love that I usually have a handful of chocolate chips that didn't make it into cookies and I can throw this together for a hot, delicious, and pretty healthy breakfast.  This really tastes nothing like the kind of oatmeal you get in the packets.  This is more like a warm, gooey granola bar.  YUM!

This is how I make Chocolate Chip Baked Oatmeal AT HOME MY WAY:

Chocolate Chip Baked Oatmeal  (I halved this recipe, which I baked in a pie plate as below.)

CHOCOLATE CHIP BAKED OATMEAL 

  • 3 cups old fashioned oats 
  • 1 cup brown sugar
  • 2 teaspoons ground cinnamon
  • 2 teaspoons baking powder
  • 1 teaspoon salt
  • 1 cup milk
  • 2 eggs (slightly beaten) (just whites works fine or egg beaters)
  • ½ cup margarine/butter or oil (I use canola oil)
  • 2 teaspoons vanilla
  • 1/2 cup (or up to 1 cup) chocolate chips (semi sweet or dark)
Directions:  Preheat oven to 350 degrees. Mix oats, brown sugar, cinnamon, baking powder, and salt. In separate dish, mix together milk, egg(s), melted butter/margarine/oil and vanilla. Combine wet and dry ingredients. Stir in the chocolate chips. Spread into a 9 x 13 dish (sprayed or lightly oiled). Bake in preheated oven for 40 minutes.  Serve warm.  Also terrific leftover.

CHOCOLATE CHIP BAKED OATMEAL - HALF BATCH - for baking in a pie plate or 8x8 square pan

  • 1 1/2 cups old fashioned oats
  • 1/2 cup brown sugar (dark or light) 
  • 1 teaspoon cinnamon
  • 1 teaspoon baking powder
  • 1/2 teaspoon salt
  • 1/2 cup milk 
  • 1 egg (slightly beaten)
  • 1/4 cup oil
  • 1 teaspoon vanilla (could also add pecans/walnuts/almonds)
  • 1/4 cup (or up to 1/2 cup) chocolate chips (I use semi sweet or dark)
Directions:  Preheat oven to 350.  Mix oats, brown sugar, cinnamon, baking powder and salt in a small mixing bowl.  In a separate dish (I used my 2-cup measurer), measure the milk to 1/2 cup.  Add 1/4 cup of oil.  Mix in the blended egg.  Stir well to mix.  Then add the liquid ingredients to the dry in the bowl.  Stir well and add 1/4 cup chocolate chips.  Pour into lightly oiled or sprayed (with cooking spray) pie pan or 8x8 square pan.  I like to use a loaf pan. Bake for 40 minutes or until lightly browned.

To serve, dip it out in a bowl and eat with a spoon or fork like you would coffee cake.

Friday, January 20, 2012

Thankful Thursdays

This little blogging hobby that I started has really evolved into something wonderful.  I started following blogs mostly to get good housekeeping and recipe ideas.  But, boy did I find a whole new world of wonderful people!  Sometimes I feel like I'm the odd person in my world.  I think you could suffice it to say that most of the people I know don't cook from scratch.  They don't make stuff!  I'm sure even my own children think I'm a little bit "out there" for making some of the homemade stuff I make (like homemade sandwich bread, chocolate syrup, chocolate pudding, homemade pancakes, homemade cornbread, and even homemade glass cleaner). Like I say, I like doing things "At Home - My Way!"  But, the best thing about blogging so far has been that I have "met" some wonderful folks.  Folks just like me!  I love that I can read about someone who made a beautiful scratch birthday cake or even made homemade chocolate chips.  I love that stuff!  I was always the little kid trying to make sandals out of a paper bag and some yarn. Ha-ha.  But now, there's Pinterest!  Woah Nellie.  Hold me back LOL!  Apparently there's lots of people just like ME!


One of those wonderful people, Veronica, asked me to write a guest post on her blog, Veronica's Cornucopia.  Its a Thankful Thursday post.  I very much enjoyed writing this post.  My mom doesn't "do" computers.  So, I even printed this one out for her.  Sometimes you write something that really nails the way you feel.  And this one did!


Veronica's blog is wonderful.  The girl can flat out bake some serious cakes!  Plus she has all kinds of other recipes and they all look really, really yummy!  Her pictures are beautiful and I love to read everything she writes.  She's funny, warm, and speaks from the heart.


Join me on Veronica's Cornucopia here!  I know you will be as happy as I was to discover and explore her delightful blog.


Gina


Friday, January 13, 2012

Tator Tot Casserole


I realize this picture is sideways - can't seem to get it rotated!  Shucks!

I'm sure everyone and their brother (well... maybe their sister) have made this recipe.  Everyone but me, I guess.  I had heard of it but really hadn't even ever eaten it before.  Crazy!


My pickier daughter came home from her new corporate job and told me ALL ABOUT this delicious dish she had eaten at a carry-in lunch.  As she was describing it to me, I said "Rebecca!  That's just tator tot casserole.  Like the Duggars make."  The dish Rebecca had at work was everything this dish is except it had mashed potatoes and cheese on top instead of tator tots and cheese.  She thought it was the best thing she'd eaten lately so I had to try it at home.


I don't usually use a lot of convenience foods (canned soup), but cooking at home always trumps eating out - even if it does include a can of soup and frozen tator tots.  


Keeping up with my pantry cooking, I had everything I needed to make this dish.  Its really great.  I can't believe I had never made it.  It was also delicious leftover.  I scraped the pan clean.  


This is how I make Tator Tot Casserole AT HOME MY WAY:


Tator Tot Casserole  


  • 1 pound hamburger (I'm cheap, I use the little tubes from Aldi)
  • 1 can cream of mushroom soup + ½ of the soup can of milk
  • Vegetables, optional (drained peas, corn, green beans, mixed vegetables)
  • Tator Tots (probably not the entire bag) (or mashed potatoes would work also)
  • Grated cheddar cheese


Brown hamburger, drain.  Add cream of mushroom soup plus ½ the can of milk.  Stir well.
Add any vegetables and stir.  Or for picky eaters like I have, leave the vegetables out.  Dump in a casserole dish (sprayed with cooking spray).  Top with tator tots (or regular/instant mashed potatoes).   Bake @ 350̊ for 20-30 minutes or until tator tots are browning.  Top with cheese.  Place back in the oven until the cheese melts.


Dig in!

Thursday, January 12, 2012

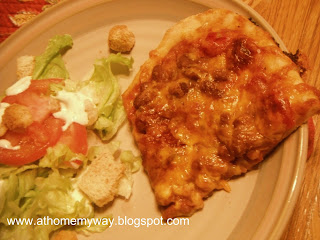
Pinto Bean Pizza (Mexican Pizza)


Last night was bowling night at my house.  Remember when that meant Girls Night?  When we used to make fun things like Homemade Stirfry or Kinda Empanadas?  Well, since the girls have left the nest, I was home alone for bowling night.  But, I had a plan!  I wanted to get some laundry done, build a fire in the woodstove and kick back with a little TV.  But, what to have for supper?  For one person?  Hmmmm... Since I've been really trying to eat out of the pantry and not go to the store OR eat out, I knew I wanted to find something to make that I already had the ingredients for.  And, since I was the only one eating it could be a recipe that I wanted to try but wasn't sure how safe it would be.  


I found a great recipe over at Lynn's Kitchen Adventures.  Lynn ALWAYS makes good stuff! I can always depend on her recipes to be sure fire!  


A side note here, I have discovered that I tend to be a "recipe free" cook.  I really have a hard time giving recipes away for the stuff I cook everyday.  Another blogger mentioned that and I had an "a-ha moment!"  That's me!  No wonder my recipes seem rambling.  Usually I'm just telling you how I do it.


But, I'll give you Lynn's actual recipe and also how I tweaked it for a small pizza with what I had in my pantry and my preferences.


Here's Lynn's recipe:


Black Bean Pizza (Lynn's Kitchen Adventures)

  • pizza crust, unbaked
  • 1 can green chilies
  • 2 cups black beans
  • 1 14 1/2 ounce can diced tomatoes, partially drained (drain off 1/2 juice)
  • black olives
  • 1 Tablespoon taco seasoning
  • 2-3 cups mexican cheese, cheddar, or a mix of cheddar and jack (whatever you like.
Mix taco seasoning and tomatoes.  Spread on the crust.  Sprinkle with green chilies, black beans, olives, and sprinkle with cheese.  Bake at 400 for 12-15 minutes or until done.

Now, of course, I had to change it.  Here's what I used.
  • pizza crust, unbaked (this recipe is what I used - I had this dough in the fridge).
  • 1/4 cup salsa (instead of the green chilies because I didn't have green chilies)
  • 2 cups pinto beans (I prefer pintos to black beans and keep small servings of homemade cooked dried pinto beans in my freezer in small containers)  (I just scooped some up with a slotted spoon and spread them on.)
  • 1 teaspoon taco seasoning (I thought 1 Tablespoon would be too much / a little chili powder would also work here)
  • 1 1/2 cups grated cheddar cheese (since I was making a SMALL pizza)
I pulled off a hunk of my dough, sprayed my cookie sheet with cooking spray and sprinkled with cornmeal. I rolled / pressed my crust to a decent shape.  Then, I mixed the tomatoes and taco seasoning in a little bowl, & spread that on the unbaked crust.  (I had tomatoes leftover since I was only making a small pizza.  I'm saving those for using in some chili.) I  topped with a few spoons of salsa.  Then the pinto beans and then sprinkled with cheese.

Baked and then PIGGED OUT!  I served this with some leftover green lettuce salad I had in my fridge along with some Hidden Valley Ranch (the mix, mixed with sour cream/buttermilk (I used lemon juice / milk there).  I know I should make homemade ranch dressing from scratch but I just haven't gotten those spices yet.

This is a terrific recipe!  If you had some leftover taco meat to spread on first it would be also great, but even without any meat, I really loved it.  Very satisfying and great for lunch as leftovers!  I believe this was a super FRUGAL meal.  I figure the crust cost me about $.25 (the whole batch only costs me about $.70), used less than one-half of the can of tomatoes, so say $.50 even on the high side.  The beans I had in the freezer and were made from dry beans, probably only $.25 and used 1/4 of a small block of cheddar cheese - $.25 which I grated for my pizza.  I figure this meal only cost me about $1.25.  We canned the salsa from our garden.  I actually only ate 1/2 of my pizza and took the leftovers for lunch at work.  What a miser I'm becoming LOL!


I am sharing this recipe at:


Wednesday, January 11, 2012

I won! "Don't Throw It, Grow It"

I won!  I won!  


I never win anything!  But, I have to say, I never play games much either.  Probably that is why I never win anything, BUT.... I WON SOMETHING!  One of my favorite blogs "Little Homestead in the City" (actually the Freedom Gardens blog by the Dervaes family in Pasadena, California) had a giveway.  I was actually interested enough in the prize for this giveaway that I was going to buy the little book if I didn't win it, but now I don't have to do that because I WON and I cannot believe it really!  


This is the book:


Its a great book about planting roots, spices (seeds), tubers, that you have in your kitchen.  You know, FREE seeds!  My mom has always planted sweet potatoes in glasses of water with toothpicks (we all did that, right?), avocado seeds, the tops of pineapples, etc. and my husband's grandma actually planted a peach tree with a seed (WOW, did she have the touch or what!). This book really goes into depth about all the different kinds of things you can plant, from beans to mustard seeds, with descriptions of what the flowers might look like and how easy/hard they are to have success with.  The author says that most things will always produce a beautiful house plant even if your climate won't let you plant outside.  This stuff is right up my alley!


I'm so anxious to get started planting and growing.  January in Missouri can be a little or a LOT depressing and a little growth in some area other than my waist or my rear end might be a good thing LOL.


Thank you Dervaes family for this great prize!  I love it and promise to really use it and grow good stuff with it.  I also hope to share this with some of my teacher friends who can include this information in their classrooms.  What a valuable little book!  Kids are going to love this stuff!  THANKS AGAIN!


Monday, January 9, 2012

Chicken & Dumplings (as good as from Cracker Barrell)


Homemade Chicken & Dumplings

As strange as it may seem, one of the first comfort meals I learned to cook was Homemade Chicken & Dumplings. (Although this is not how my mom makes chicken & dumplings.  Hers are dropped and are fluffy like a biscuit.)   As a young married couple we spent lots of time with another young couple.  We laughed, cruised many a country road, and had little structure to our lives (those were the days LOL).  A few times we ate dinner with them and one of my friend's specialties was this recipe for Chicken & Dumplings.  My very picky husband must have felt pressure to be nice and taste her dish (he would never have tasted it for me), but he instantly fell in love this creamy comfort dish.  Since learning to make this I have enjoyed many a plate of chicken & dumplings at Cracker Barrel restaurant knowing the entire time that mine is every bit as good as what you get in this restaurant.


For years I have cooked chicken breasts (bone-in and with skin) (which develops a richer broth for my chicken & dumplings than just using boneless skinless chicken), but I have since discovered a very frugal way to make this dish.  A few weeks ago I cooked a whole chicken in my crockpot.  We ate dinner with it and then deboned the rest of the meat.  We placed the meat in a freezer container and the bones, skin and remaining bits of meat in a separate freezer container (for making broth at a later date).  I've been trying to stay with a meal plan and cook rather than eat out, and the other morning I quickly put the bones, skin, bits of meat portion in my crockpot and placed about 4 cups of water in the crockpot.  I turned it on low and it cooked all day (probably 8-10 hours).  I put the container that had the meat we had deboned in the fridge to thaw.  When we got home from work, I strained the broth in the crockpot through a small strainer into a large pot, added in the meat I had, and mixed up a batch of dumplings.  (My crockpot doesn't develop a full rolling boil which is needed in order to cook the dumplings.)


This was truly a feast!  Man, it was delicious!  And FOR THE RECORD, we loved it even better warmed up the next day.  


Here's how I made Homemade Chicken & Dumplings AT HOME MY WAY:


Homemade Chicken & Dumplings

  • Large pot of meat / chicken broth (as above instructions or however you choose)
Then mix up the dumplings:
  • 2 1/2 cups of flour
  • 1/2 teaspoon salt
  • 1 teaspoon baking powder
  • 1 rounded Tablespoon shortening or 1 1/2 Tablespoon Margarine/butter
  • 2/3 plus 2 Tablespoons milk
Instructions:

Mix the dry ingredients.  Cut in the shortening/margarine/butter until crumbled very small.  Stir in the milk.  Using floured hands, form into a ball.

Divide the dough in half.  On a floured surface, roll out the 1/2 section of dough using a floured rolling pin.  Roll to about 1/4" like a thick pie crust.  Cut in squares (I use a pizza cutter).  (This recipe would not be good for dropping - it needs to be rolled and cut.)

Bring the broth/chicken in the pot to a rolling boil.  Drop the dumplings in the boiling broth.  Stir lightly.  

Roll the remaining half the same way and add to the pot.

Thicken by mixing 1/2 cup COLD water with 2 Tablespoons flour, stirred until smooth.  Add that mixture to the pot.  You may have to do this again to thicken the broth to your liking since your pot of broth may be a different amount than mine.

HINT:  My family likes the illusion of buttery chicken and dumplings.  I add 2-3 drops of yellow food coloring to the thickened mixture and stir to give it a hint of a buttery look without adding extra butter.  But that is entirely optional.

HINT #2:  If you were really being prepared, you could make the dumplings ahead, freeze them uncooked on a cookie sheet (flash freeze) and store in gallon bags for dropping in.  I have done this and it works great.

HINT #3:  This recipe (for the dumplings) also works great for using in beef broth with beef / roast, etc.  I usually cut the dumplings smaller for beef broth but that's just because that's how we're use to seeing it on the plate.

Remember not to stir a whole lot.  You don't want to destroy the dumplings as they cook.

I serve this with my favorite (breaded stewed tomatoes) (recipe coming soon) and easy cornbread.  In the picture, I took day old cornbread, sliced them, buttered them and browned them in the broiler.  That freshened them right up and they were mighty tasty!


Rolled and cut a one-half section of the dough.


Meat and broth cooking.


See how they puff up when cooking?\


This post linked up here:
Newlyweds-blog.com Button

Wednesday, January 4, 2012

Homemade Puff Pastry


Over New Year's weekend I did lots of cooking.  In addition to Homemade Lambert's Throwed Rolls, I tried a recipe for Homemade Puff Pastry.  I love anything made with puff pastry from brie with raspberry sauce to guava turnovers (a Florida favorite) but puff pastry can be a little hard to come by in our small town.  I ran across this recipe on the King Arthur Flour blog (which always has wonderful recipes).  It worked like a charm.  I have to confess that it was a little "buttery" for my tastes.  I may try to trade out some of the butter for shortening next time, but it worked beautifully and I will definitely be making this again.  I had some guava paste in the fridge (which my mom brings back from Florida) and also some frozen blackberries and blueberries, so I tucked some of each into these turnovers and they were really something special!


Here's how I made Homemade Puff Pastry AT HOME MY WAY:


Homemade Puff Pastry


2 cups all purpose flour
1/2 teaspoon salt
1/2 teaspoon baking powder
1 cup cold butter, cut into pats
1/2 cup sour cream


Directions:


1.  Whisk together the flour, salt, and baking powder.


2.   Add the pats of butter (slices), working it in with fingers to form a coarse/crumbly mixture.  Leave most of the butter in large pea-sized pieces.


3.  Stir in the sour cream (the dough will be crumbly).  Turn onto a lightly floured surface and work to form a blob.


4.  Pat the dough into a rough log and roll into a 8 x 10 rectangle.


5.  Dust both sides with flour and starting with a shorter end, fold like a business letter (in thirds).


6.  Flip the dough over.  Turn 90 degrees.  Roll into an 8 x 10 rectangle.  Fold into thirds again.


7.  Chill the dough for at least 30 minutes.


8.  I divided mine in half.  Rolled like pie crust, but a rectangle.  Cut into squares and filled with guava paste or berries.  Sealed.  Brushed with water, sprinkled with sugar, and baked.


9.  The directions say to freeze dough for up to two months.  Thaw in the fridge.


**  I didn't read my instructions completely.  I only formed into a blob, wrapped in plastic, and refrigerated for a couple of hours.  After a couple of hours, rolled and formed the turnovers.  I'm sure if I had double rolled/folded the dough, I would have had more layers.  Next time!  There's always next time!  They were completely delicious anyway!

Here are some more pictures (as pitiful as they are).


Tuesday, January 3, 2012

Making Throwed Rolls (Lambert's) At Home My Way


I enjoyed a much appreciated few days off for New Years.  Let's suffice it to say that I like to cook A LOT and boy did I ever cook a bunch.  I needed to come back to work to stay away from the kitchen LOL.  I'll blog the recipes for some of the other recipes I tried over the next couple of days.  But, the first is a recipe I had in my "to make" file for hot rolls.  They are supposed to taste like Lambert's famous Throwed Rolls.  Well... I haven't ever been to that restaurant.  I live in Missouri, however  I have never been to Sikeston. But, they have rave reviews and I figured they had to be yummy! 

They were light, fluffy, yeasty, and a tad sweet.  Really GOOD! We served them along with BBQ'ed pork chops since we were enjoying super nice weather for New Year's Day.  I had mine with some homemade Baked Apple Butter (recipe to come).  Mmmm - it was a feast!  I especially loved the pull-apart way the rolls are formed in the muffin tins.  They just come apart right where the good stuff needs to go!

Here's how I made "Throwed Rolls (Lambert's)" At Home My Way:

Throwed Rolls (Lambert's)

Yield:


12 large dinner rolls


Ingredients:


  • 1 teaspoon sugar
  • 2 1/4 teaspoons (1 pkg.) active dry yeast
  • 1/4 cup warm water (110-115 degrees F)
  • 1 cup warm milk (110-115 degrees F)
  • 1/4 cup (1/2 stick) melted butter
  • 1/4 cup sugar
  • 1 egg, lightly beaten
  • 1 teaspoon salt
  • 4 cups all-purpose flour
Instructions:


(See additional notes for bread machine directions.  That's how I made my dough.)


In a small bowl, combine the teaspoon of sugar and the yeast with the warm water and allow to foam (5-10 minutes).   In a large mixing bowl, mix the warm milk, melted butter, sugar, egg and salt. Add the yeast mixture and stir. Stir in 3 cups of flour. Stir or knead in another cup of flour (or more, if needed) and knead for 5-10 minutes to make a smooth, elastic dough.Scrape the large mixing bowl clean (or as clean as possible) and place dough in the bowl. Grease the top of the dough with butter or oil and cover with a clean cloth. Place in a warm location (I turn the oven on for 1-2 minutes, then turn OFF and place covered bowl in the warm oven to rise) and let rise until doubled in size, about 60-90 minutes.


Liberally butter a 12-cup muffin pan. With buttery hands, deflate the dough and divide into 24 pieces. Roll each piece into a ball. Place two balls in each muffin cup. Gently grease the tops and cover with a clean towel.


Let rolls rise in a warm place until nearly doubled in size, about 45 minutes. Preheat oven to 350 degrees Fahrenheit and bake rolls for 20-25 minutes, until tops are browned and rolls are done. (Check rolls after 15 minutes, and cover loosely with foil to prevent excess browning, if needed.)


Brush with melted butter hot out of the oven.


I made my dough in the bread machine like this:

I mixed the yeast + 1/4 cup warm water.  I added the sugar, then warm milk, lightly beaten egg.  Blended well.  Added to my bread pan.  Then topped with the flour and salt.  When the dough setting was finished, I proceded with forming my rolls in the muffin pan.


I realize my pictures are terrible.  My skill is in the kitchen, NOT behind the lense LOL.


  I placed them for safe keeping (from nibblers) in the microwave before supper ;)


My attempt at posing food is really pitiful..