Thursday, April 23, 2015

Sewing Beach Bags


Even big girls need Easter baskets and this year I made my girls a couple of fun Beach Bags to hold their treats.  

I'm not going to include a pattern.  Just a link to this great used 2004 pattern book that I bought at Amazon:


You can find it on Amazon HERE!


A friend of my older daughter had one of these bags that her mother made for her to use as a diaper bag.  The body of the bag is quilted and it has pockets galore.  I knew it would make a fun project and a perfect beach bag for summer.  I begged and pleaded for my daughter's friend to ask her mom where she got the pattern.  She sent me a picture of the book and I searched Amazon until I found it.  I don't believe it is in print anymore, but the directions are easy and the book was cheap.

You start by cutting all of the pieces out and quilting the main body of the bag.  I had never done any quilting, machine or otherwise, but I figured it out with no problems. On the aqua bag, I actually drew lines on the lining fabric so I knew where to sew, but for the pink one, I just free styled it, and it turned out just fine!

Here's a closeup of the quilting:


A friend and I noticed after I showed the bags to her that they were completely reversable.  I used cheap bath towels from Walmart for my lining.  Terry cloth at the fabric store is about $10 per yard and this was a much cheaper way to get terry cloth for less $$.


I had the gray fabric and some old batting in my fabric stash so I just had to buy the accent fabrics for the pockets.  

I really think they turned out nice.  As nice as any Vera Bradley bag, if I do say so myself!  I hope to add a few extras like bikini bags (made from PUL for wet bathing suits) and sunglass cases, but I haven't gotten those done yet.  I was just glad to get these finished in time for Easter morning.

My girls were thrilled and I can't wait to make myself one!  Thinking I'll use black fabrics and black thread for the quilting.  Fun-fun!  These were really fun and super rewarding to make!  I can't wait to make more of them!

Enjoy!


Gina


Wednesday, April 22, 2015

Quickie Supper - Remaking Leftovers into- Beanie Weinies & Mac & Cheese


Sometimes you just need a quick meal idea - to get some food on the table.  Sure, you can run to your favorite burger or pizza joint, but all of that food you have in your pantry/cabinet is already there, right?  You might as well cook it and be $10+ richer in your pocket?  That was my theory the other night, anyway...

I really wanted to go out for supper.  I get home from work 6PM-ish and had managed to force myself to go for a run.  My only problem is that after a supper-time run, I am really famished by the time I get home!  I tend to gravitate to takeout food in times like these, but I took a deep breath and a long look in my refrigerator and this is the meal I came up with.

It was DELICIOUS!  

It immediately brought me back to the days when my dad was a long distance truck driver and my mom made us quick and easy suppers like these to stretch her budget.  A meal like this can be stretched with more or less hotdogs and more or less cans of beans.  My mom even sometimes made beanie weenies with a small amount ground beef instead of hotdogs and we really liked that too!  

Instead of macaroni and cheese, we typically had leftover spaghetti hanging around in the fridge, so more often than not, my mom always made "spaghetti & cheese" instead of macaroni and cheese.  Something about slurping up those cheese covered noodles makes this dish taste even better.

So, this is a flexible meal - stovetop cooked baked beans with or without meat; some kind of cooked pasta with a little butter, milk, and cheese, and any other vegetable you might have hanging around.  This time of year, for me it's asparagus fresh from my garden.  Gotta love that!

Supper doesn't have to be an expensive, laborious task.  Suppers just like this beanie weenie/mac & cheese dinner, can fill 'em up just as well, with very little cost and lots of smiles!

Here's how I make my Beanie Weenie - Macaroni & Cheese meal AT HOME MY WAY:

Beanie Weenies
  • Canned pork & beans (generic is just fine) (do not drain)
  • hot dogs (just a few, sliced into thick chunks)
  • brown sugar
  • raw onion or onion powder (my family doesn't like cooked onion so I always use onion powder)
  • ketchup
  • mustard
Instructions:

In a saucepan or skillet, brown thick hot dog slices in a little bacon grease (like 1 teaspoon), butter/margarine, or a dab of oil.  Stir around until they start to have brown spots on the hot dog pieces; dump on your can(s) of pork & beans.  Sprinkle on some onion powder (like 1 teaspoon).  If you want to use fresh onion, just cook that first in the oil/bacon grease/ butter/ or margarine before you brown the hot dog slices.  Next add a little brown sugar (like 2 Tablespoons per can of pork & beans that you use); ketchup (3 heaping Tablespoons per can of pork & beans), mustard (3/4 teaspoon per can of beans).  Stir well and cook without a lid until thick - about 15 or 20 minutes while you get the mac & cheese ready.

Mac & Cheese

  • Cooked/salted pasta (leftover or freshly cooked spaghetti pasta, elbow macaroni, rotini noodles, shell pasta, etc.)
  • Butter/margarine (2 Tablespoons cut from the stick)
  • Milk
  • Cheese (American, Velveeta, grated cheddar)

Put drained pasta in a saucepan.  Add 2 tablespoons of butter/margarine, a drizzle of milk (just enough to cover the bottom of the pot), a few slices (2) of cheese and a little grated cheddar.  Heat on medium and stir often until all of the cheese is melted and mixed through.  Taste to see if it needs a little salt.  A little pepper is also good.  Remove from burner and let sit about 5 minutes before serving (this allows the cheese to set up some making it thicker and yummier).


Enjoy!


Gina


Tuesday, April 21, 2015

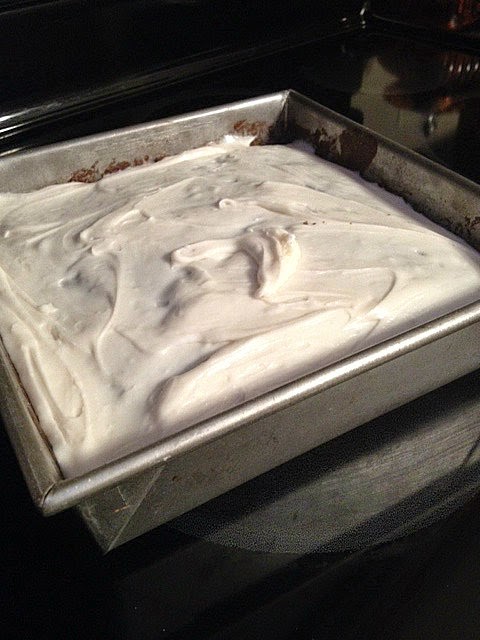
Snack Size Chocolate Wacky Cake - SUPER FRUGAL (no eggs/milk/butter & no bowl); DELICIOUS!


I love having recipes that I can rely on when I have limited ingredients.  This is one of those recipes!  I have had other recipes for "Wacky" cakes, but I really like this one because it only makes one small layer cake or an 8" square cake.  I would guess that it would make one pan of 12 cupcakes.  


"Wacky" cakes were created by resourceful women during the depression when ingredients weren't as readily available as they are now.  Sometimes we all have limitations on ingredients, whether it be because of money or time.  I thought the recipe for this little cake would be a great one to have in my repertoire just for those days! It is for this reason that I'm sharing it on my blog.  I will definitely be making this recipe A LOT!


These days it also seems like there are increasing food allergies so anyone who would be needing a cake that doesn't call for eggs will really love this recipe!  


However strange it sounds, it WORKS!  It is a nice little moist and chocolatey cake that will do a dandy job of providing a frugal dessert for your family.  It wins on all counts in my book.  Delicious, frugal, made with pantry ingredients, AND you mix it right in the pan so - no extra bowl to wash.  Score!


I found this recipe at a great blog - Sweet Little Bluebird. You can find the original recipe HERE.  In fact, she has lots of versions of this Wacky/Crazy Cake, including lemon, vanilla, coffee/Kalua on her blog.  I can't wait to try more Crazy Cake recipes, and maybe come up with a few of my own.

Who needs a bunch of ingredients to make a cake?  Who even needs a bowl?  Not I!


Here's how I made Sweet Little Bluebird's Snack Size Chocolate Wacky Cake AT HOME MY WAY:


Snack Size Chocolate Wacky Cake


  • 1 1/2 cups all purpose flour
  • 3 Tablespoons cocoa powder
  • 1 cup white granulated sugar 
  • 1 teaspoon baking SODA
  • 1/2 teaspoon salt
  • 1 teaspoon white vinegar
  • 1 teaspoon vanilla
  • 5 Tablespoons oil (I used olive)
  • 1 cup water
Directions  preheat oven first to 350°:

Mix first 5 ingredients in a GREASED 8" square or round baking pan until mixed well.  Make 3 depressions in the dry ingredients with the back of a spoon-two small and one larger.  Pour vinegar in one depression, vanilla in the other small depression.  Pour the oil in the third, larger depression.  Pour water over all.  Mix well with a spoon until smooth.

Bake for 35 minutes in fully preheated 350° oven.  Cool and frost.  (I just mixed up my own buttercream using a couple tablespoons of butter, a few cups of powdered sugar, a drizzle of milk and a little vanilla.)


ENJOY!


Gina