Wednesday, August 28, 2013

Mexican Rice - Homemade - Ditch the Box


This past weekend I made tacos, Mexican Slaw, homemade refried beans from the freezer (recipe coming soon), and this recipe for Homemade Mexican Rice.

I grew up eating something my mother called "Spanish Rice."  I don't honestly know how she made it.  I know she would never have made anything from a box, but it could have just been rice, tomatoes, and chili powder for all I know LOL.  We loved it but I don't know how she made it.  She rarely used a recipe.

I found this recipe at Lynn's Cooking Adventures.  She always has the BEST recipes and they are always dependable.  Since my girls both like Mexican Rice, I wanted to find something I could make at home without buying one of those "little boxes".  We ditched the box and haven't looked back.  I actually prefer using canned chicken broth when I make this.  I'm not sure why that is.  My homemade chicken broth/stock is just very concentrated and I like a more tomato-y/smokey rice, but you use whatever you like.  This recipe is easy, just as easy as one of those boxes.  Maybe a tad longer cook time, but I don't imagine it makes much difference one way or the other when you are making tacos.  With all that chopping and getting shells/tortillas ready, this can be cooking in the background until perfectly fluffy.

Thank you Lynn at Lynn's Cooking Adventures for this terrific recipe!

This is how I made Homemade Mexican Rice AT HOME MY WAY:

Homemade Mexican Rice

  • 3 tablespoons vegetable oil
  • 1 cup uncooked long-grain rice (not minute rice)
  • 1/2 teaspoon garlic salt
  • 1/2 teaspoon ground cumin (key ingredient, don't omit)
  • 1/2 cup tomato sauce (I used one small can.)
  • 2 cups chicken broth (I use 1 can of chicken broth.)
Instructions:


Heat oil in a large saucepan or a skillet, over medium heat and add rice. Cook, stirring constantly, until puffed and barely golden. While rice is cooking, sprinkle with garlic salt and cumin. Stir in tomato sacue and chicken broth; bring to a boil, stir well. Reduce heat to low, COVER and simmer for 20 to 25 minutes, stirring OFTEN (especially at the beginning when the rice will sink and stick to the bottom of the pan).
(** Sometimes I don't have garlic salt and instead, salt my rice like I would for 1 cup of rice, and just use garlic powder.)

Tuesday, August 27, 2013

Mexican Slaw


We have some friends who have an annual Firework Frenzy each year around July 4th.  It's a great chance to visit with my husband's friends from high school.  They gather together and enjoy each other's company more than just about any high school class I have ever heard about. In addition to old classmates, the party is filled with family, friends, friends of friends, work friends, and LOTS of delicious food!  This much anticipated party offers the best side dishes you will ever find.  What a bunch of great cooks!  Our friends have it down to a science!  They set up big tables labeled "desserts" and "sides" so that you know immediately where to put your dish.  Love that idea!

I go to this party excited to see my friends, excited to try the food, and we ALWAYS bring home lots of good memories and at least one recipe that we can't get enough of.  This recipe for Mexican Coleslaw was THAT RECIPE this year.  I love the combination of black beans, corn, cabbage and smokey vinaigrette.  It's reminds me a little of the ramen slaw which also is a big favorite at the Firework Frenzy but this slaw isn't sweet and has a small amount of heat.  

This coleslaw would be great for potlucks (it withstands a hot day without refrigeration since it has no mayo, etc.).  I think it would also be great served on fish tacos.  You could make it specifically to serve with fish tacos or serve it the second time as fish taco topping in your menu plan.  I served it Saturday with regular tacos as a side dish.  

As a side note, I think this recipe would also be great served with tossed/chopped lettuce instead of cabbage.  But that will be another day...

I wanted to post this recipe yesterday and could not find a similar recipe anywhere on the internet (I had forgotten my recipe at home.)  Well... if I couldn't find a recipe like it anywhere, then definitely I want to be posting that recipe!

I know you will love it.  Give it a try and let me know what you think.  This is how I make Mexican Coleslaw AT HOME MY WAY:


Mexican Coleslaw

  • 1 bag coleslaw mix 
  • 1 can corn - drained (I used generic)
  • 1 can chopped green chili's (I drained a small amount of the juice)
  • 1/2 red pepper - chopped/diced (I omitted)
  • 1 can black beans (drained & rinsed well)
  • Small amount of chopped cilantro (I omitted because I don't like cilantro)
Dressing:
  • 1/3 cup lime juice
  • 1/3 cup rice vinegar
  • 5 Tablespoons oil (olive, canola)
  • 1 Tablespoon garlic powder
  • 1-2 Tablespoons cumin (I used two)
  • Salt & Pepper to taste

INSTRUCTIONS:

IN a small bowl, whisk together the dressing ingredients:


DRAIN the black beans and rinse well.  Place in a large bowl.


DRAIN a little of the juice from the green chili's and add to the bowl:


DRAIN the juice from the corn and add to the bowl:


STIR well all of these ingredients (black beans, green chili's and corn):


ADD the slaw mix and red pepper, if using, and the vinaigrette.  Stir well to coat and refrigerate at least an hour before serving:


Enjoy!

Gina

I shared THIS recipe with some other great bloggers AT (come visit):


and

HERE 
(All She Cooks - Wonderful Food Wednesday)

Monday, August 26, 2013

Twice Baked Potato Casserole - Again


I wanted to post the recipe and directions for this casserole, which I have posted before (it included instructions for using real potatoes) and this time include the instructions for using instant mashed potatoes.  Sometimes I just roll like that and for some reason my husband will eat leftover instant mashed potatoes better than he will eat leftover real mashed potatoes (really, he won't eat real leftover mashed potatoes at all).  If we intend to eat this casserole leftover, then I only use instant.  It's pretty easy to mix up and get into the oven.  I'm betting you could even make an extra for the freezer for reheating on busy days but I haven't tried that just yet so I'll let you know.

This casserole is really super delicious!  We served it with BBQ chicken. YUM!  I also think it would make a great potluck dish and would reheat in the microwave if you use a micro-proof dish for those carry-ins when you just don't know what to make and are tired of dips and cheeseballs!

Here's how I make Twice Baked Potato Casserole using instant mashed potatoes AT HOME MY WAY:

Twice Baked Potato Casserole 
(using Instant Mashed Potatoes)

Ingredients:

  • Prepare instant mashed potatoes according to instructions on the box to equal 6 cups of mashed potatoes (including the salt, milk, water, butter/margarine that the box instructs)
  • 1 (8 ounce) package cream cheese, softened (I microwave)
  • 1 cup (8 ounces) sour cream
  • 1 teaspoon garlic powder
  • 1 cup shredded cheddar cheese
  • Crispy cooked and crumbled bacon (we used those real bacon bits and just sprinkled with those on top of the cheese - about 1/4-1/2 cup, however much bacon you want)
Instructions
  1. Preheat oven 350 degrees.
  2. Combine prepared instant mashed potatoes (6 cups) with the sour cream, softened cream cheese, and garlic powder.  Stir well until creamy.
  3. Spoon into a  sprayed 9x13 baking dish or fat casserole dish that has been sprayed with cooking spray. Top with cheddar cheese and bacon. Cover and bake for 30 minutes. Uncover and bake for an additional 10 minutes or until cheese melts.
(I used a fat square casserole dish (not 9 x 13) for the picture which made a thick, creamy potato layer with the cheese/bacon layer on top.  I think that worked out perfectly!)


Sunday, August 25, 2013

Raisin Bread


My daughter and her boyfriend came home from college this weekend.  We've had a great visit and it is so good having a few more mouths to feed.  We were perusing the grocery store yesterday and Rachel and her boyfriend were admiring the raisin bread in the bread aisle.  I told them not to get it, so I could try making some.  I've been wanting to try making homemade raisin bread for quite some time.  I love toast made with raisin bread. 

I have a special love of food and farm blogs and lately I've been loving a blog called Chickens in the Road.  Suzanne has a post on raisin bread and her picture of raisin toast just made me CRAVE it.  Suzanne's post is found HERE

I used my own sandwich bread recipe, added one egg, a half of a cup of raisins and one teaspoon of cinnamon to the liquid ingredients in my bread recipe.  I used my bread machine for the dough but you could do it by hand just as well.  It turned out perfectly!  My daughter and I made toast with it this morning.  She ate hers with honey and I ate mine with butter.  Mmmmmm...  Make some and you will know what I'm talking about.

Here's how I made Raisin Bread AT HOME MY WAY:

Raisin Bread

1 cup warm water (hot but no hurt - should feel like hot bath water)
2 Tablespoons sugar
2 1/2 teaspoon yeast (1 packet)
1/4 cup oil

1 egg (beaten)
1 teaspoon cinnamon
1/2 cup raisins
3 cups AP flour or bread flour (unbleached is best)

1 1/2 teaspoon salt

Instructions:
  • In a 2 cup measuring cup, measure the very warm water (1 cup), stir in yeast, sugar. Set a timer for 10 minutes. It will start bubbling and at the end of 10 minutes, will look like a big glass of root beer with a tall soft, frothy foam on top. Add the oil, cinnamon, and beaten egg, stir.  Add 1/2 cup raisins and stir gently again. and Dump in the pan of the bread machine.

  • Next add your flour and top with the salt. (I realize your bread machine may say to do this in a different order, but do it this way and you will have a perfect loaf.)

  •  Set your bread machine to the dough setting.

  •  And the end of this cycle (when it is "ready"), dump the dough directly into a sprayed/prepared bread pan.  Press the dough lightly until it fills the bread pan. 

  • I did brush on a mixture of egg yolk + a little water to give the loaf that deep sheen.  I saw that idea on the Hickery Holler Farm Blog and it works like a charm.  That step is purely optional and the bread tastes no different because of it.  Just looks prettier!

  • Let rise 1 hour or until it rises up out of the loaf pan by an inch or so.
Mine looked like this when it was READY to go into the oven:

  • Preheat your oven completely before putting the loaf in -to 350 degrees.

  • Bake at 350 degrees for about 30 minutes or until golden brown. (check at 25 minutes).

Fresh from the oven:

  • Let it sit in the pan about 5 minutes. Then, carefully (because the loaf is so soft) take it out of the pan and let it cool on a cooling rack. Let it cool completely and then slice using an electric knife or large surrogated knife.


This morning I sliced the bread with my electric knife and we had a delicious breakfast.  For sure this is a keeper recipe!


  • One more hint is to let your bread cool completely before slicing and to let it cool completely before bagging it up. 

Enjoy!
 
Gina

Thursday, August 22, 2013

Canning Peaches - Small Batch


Each winter I sit around looking at farm/gardening magazines, newspapers, and reading blogs dreaming about canning and gardening. Oh the things I will do!  Then, as summer arrives, life gets busy. I work all day coming home dead beat and my stuff just sits in the garden or on my counter, waiting for me.  Eventually it gets to the compost pile and I get no canning done!  Then, winter comes again and I think, "Next year!"  

It occurred to me the other day while reading one of my favorite blogs (Hickery Holler Farm Blog) that most people who work on canning projects are working on it when they are also dead tired, that typically days aren't set aside for these projects but they are fit into already busy days.  Families work together to get the summer's bounty preserved at the end of already long days.  The fact is, that I am NO DIFFERENT THAN ANYONE ELSE!  I'm tired and I still have stuff to do!  There are never enough hours in the day for me or anyone else ha!  Yet, THEY still get it done while I just dream about it.   

In an earlier post, I mentioned making Peach Preserves with some special summer peaches that I bought locally not too far from my home.  I had lots of peaches leftover and on Tuesday they were fading fast. Definitely they weren't waiting for the weekend.

After making supper Tuesday night, I jumped right in!  I had never canned peaches before but dug out my trusty Ball Blue Book.  In it I found this recipe for canning peaches "cold pack", which basically means you sterilize the jars, lids, and rings; peel, pit, and slice the peaches directly into the jars; and pour over the fruit a hot light-sugar syrup; then process in a hot water bath.  

I liked this method because I could do however many peaches I had and I wasn't required to have a big bunch of peaches to work with.  I've also discovered this summer that canning isn't about having a truckload of fruits or vegetables to work with.  Sometimes small batch canning is the best of both worlds; both manageable and affordable.

Here's how I made Home Canned Peaches AT HOME MY WAY:

Canned Peaches

  • Peaches (ripe)
  • Fruit Fresh (optional)
  • Sugar
  • Water
  • Jars, lids & rings (jars and rings are reusable; lids are not)
Instructions:

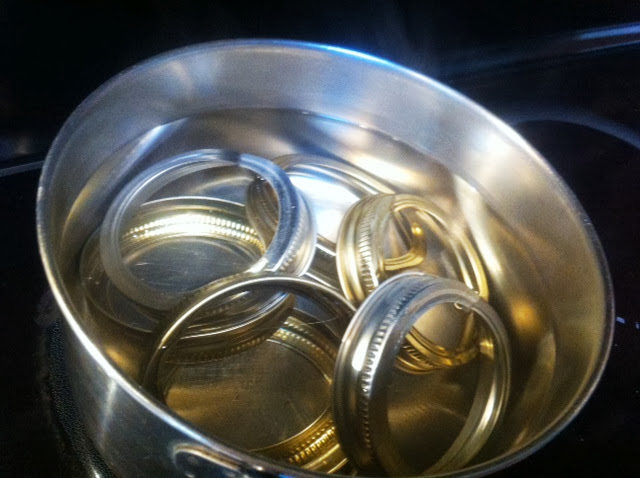
Sterilize jars, lids & rings.  I used the dishwasher for my jars and placed the lids and rings in a small pot of water on the stove to stay hot until I was ready for them. 

Peaches are like tomatoes, you can place them in boiling water and then cold water and the peelings slip right off.  So, I put about 10 peaches in a pot of boiling water until I could see the peelings loosening and then placed them in a sink of cold water.  I then added more peaches to the pot and kept adding them to the sink with cold water until they were all ready to peel.

I slipped my knife around the dip in each peach, pulling the two halves apart; removed the pit, peeled and removed any soft spots, and sliced into my sterilized jars.

Light Sugar Syrup:

1 1/2 cup sugar
5 1/2 cups water
5 1/2 teaspoons of Fruit Fresh (optional)

Place in a pot that will pour easily and heat until the sugar dissolves.  Keep hot until ready to pour over the peaches in the jars.

As the jars are filled jars with fruit, pour over the syrup - leaving space of about 3/4 inch at the top of the jar.  Add lids/rings, and tighten but not too tight.

When I ran out of syrup and still had peaches, I just made some more.  It doesn't take long to get ready and just heats a minute to dissolve the sugar.

Water Bath process - for 20 minutes for pints; 25 minutes for quarts.

(Water needs to completely cover the jars in the canner and they need to sit upright - no laying down jars.)  NO PRESSURE CANNING NEEDED.


After they process, remove them from the water and sit on the counter to cool/seal.  You will hear them pop when they do that.

Now won't these taste delicious come about February? Maybe I'll eat some while I'm reading gardening blogs and planning the next gardening/canning season!


Enjoy!

Gina


Wednesday, August 21, 2013

Pumpkin Chocolate Chip Muffins


School starting always puts me in the mood for new beginnings!  I don't even have any kids living at home IN school this year (our younger daughter IS a junior in college but she lives about two hours away from us) BUT I still find myself somehow inspired to get back with the program!  Time to start planning ahead and sticking to a plan.  Enough spending money on eating out!

I haven't been very good this summer at making things for breakfast.  I ate my first bowl of homemade oatmeal this week.  It was so delish!  Sure beats all of the donuts (eek!) that I have been stuffing my face with this summer LOL.

This morning I woke up early.  Feeling pretty good for a change, I jumped up and put a load of clothes that I had washed late last night into the dryer.  (I also haven't been very good at using my clothesline which I dearly love but don't seem to be able to fit into my schedule these days.)  Funny how things "come to you" but as I was headed to the laundry room I remembered making pumpkin chocolate chip muffins.  Hmmm.... They sounded so good.   Typically finding recipes at my house is like finding a needle in a haystack but quickly I laid my hands on this muffin recipe and gave it a try.  I've made pumpkin muffins before with a different recipe (which I yet need to lay my hands on) but since this was the first one that I touched in my search through the archive of paper recipes that I  continue to accumulate, this is the one I made.  

These muffins turned out great!  They were quick to stir together and even though I only got up 15 minutes early this morning, I managed to put the clothes in the dryer, mixed up and baked these pumpkin chocolate chip muffins, cleaned up the mess, and even cleaned my bathtub with Borax.  Go figure!  Some days are just like that, I guess!  Lord knows I have enough of the other kind of days when I can't get a single thing done!

Here's how I made Pumpkin Chocolate Chip Muffins AT HOME MY WAY:

Pumpkin Chocolate Chip Muffins

  • 1/2 cup white sugar
  • 1/4 cup applesauce (I used a single serve size applesauce)
  • 1 1/2 cup all purpose flour (unbleached is best)
  • 3/4 teaspoon baking POWDER
  • 1/2 teaspoon baking SODA
  • 1 teaspoon pumpkin pie spice (cinnamon would work)
  • 1/4 teaspoon salt
  • 1/4 cup oil
  • 2 eggs
  • 1/4 cup water
  • 3/4 cup canned pumpkin (1/2 of a 15oz can)
  • 1/2 cup chocolate chips (I used semi sweet) (optional) (raisins would be good also or dried cranberries, nuts, etc.)
Instructions:

PREHEAT THE OVEN TO 350 DEGREES.

Beat the eggs in a mixing bowl (with a fork or whisk).  

Using a spoon, add to the bowl the applesauce, sugar, baking POWDER, baking SODA, salt, pumpkin pie spice, oil, water.  Now stir in the flour.  Then, stir in the pumpkin and after that is stirred in, stir in the chocolate chips.

Place in sprayed muffin tins (or use cupcake papers).  They don't rise much so just fill the muffin tins, not quite to the top.

Bake at 350 degrees for 25 minutes or until they spring back when touched and are browning a little bit.

Enjoy!
Gina

Tuesday, August 20, 2013

Pineapple Sheetcake - Potluck Success


I got the recipe for this Pineapple Sheetcake from my husband's aunt.  She is a wonderful cook and a very special lady!  My husband likes to say that it's almost like he has two moms (Aunt C is his mother's sister and she lived in their basement for many years while he was growing up).  There is a funny story about Aunt C buying him some blow up shoes so that he could try walking on water.  Let's just say that didn't work for him LOL.  Back to the cake...

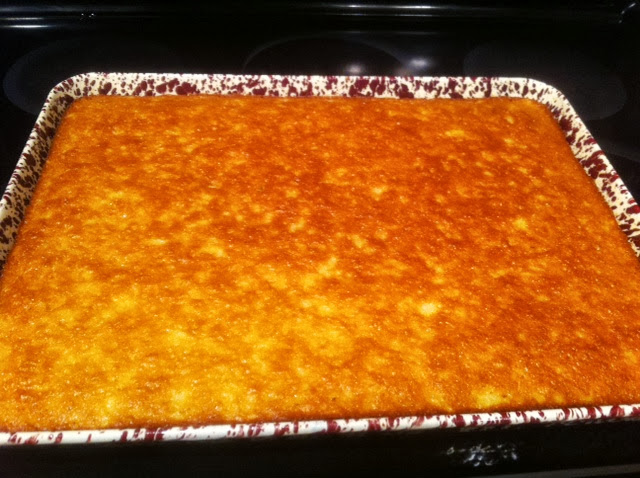
This is one of Aunt C's most requested dishes!  This Pineapple Sheetcake makes an appearance at just about every single family dinner whether it's Christmas or the 4th of July.  We all love it and savor leftovers (if there are any).  It is not overly sweet.  The cake has no oil/fat in it since it includes a whole can of crushed pineapple and the whole thing turns out moist and just delicious!  

I made this cake for a potluck lunch at work the other day.  I had worked all day at the office, worked at my daughter's house after that and since we were not getting home until late, I was trying my best to talk myself out of making it.  It was tempting to run to the store and just buy something.  However, I had committed on "the list" to bring "cake" so I stuck with the plan.  

On our way home from Rebecca's house, Rebecca swung by the store so I could get some baking soda and cream cheese, the only items I needed for making this cake.  We wheeled into the driveway at 8:55 PM.  Ugh... you gotta be kidding me, I thought as I started mixing the cake.

I can happily report that this cake was fully baked and frosted and cooling on my counter by 9:35 PM.  Wow!  That's MY kind of cooking!

If you don't have an official sheetcake pan, you could probably use a 9x13 pan, but your baking time might be a little longer so allow for that.  The cake should start releasing from the edges of the pan and spring back when it's done, with a toothpick or knife coming clean when inserted in the middle of the cake.

Here's how I made Pineapple Sheetcake AT HOME MY WAY.  This is a recipe you should hang on to!  It's delish!

Aunt C's Pineapple Sheetcake

  • 2 eggs, well beaten
  • 2 cups sugar (white, granulated)
  • 2 cups flour (all purpose, unbleached is best)
  • 2 teaspoons baking soda (NOT baking powder)
  • 1 can crushed pineapple (DO NOT DRAIN)
  • 1/2 teaspoon vanilla
Instructions:

First thing, preheat oven to 350 degrees

In a mixing bowl, with a fork or whisk (no mixer needed), beat the eggs.  Add the sugar to the bowl, mix well with a large spoon.  Add the baking soda, mix again.  Add the flour, pineapple, and vanilla. (Remember not to drain the crushed pineapple.)  Mix well, just by hand with a spoon.

Spray sheetcake pan with cooking spray and dump the cake batter in.  Spread well to cover.


While the cake is baking, mix up the frosting (I used a wooden spoon, no mixer was needed.)


Bake approximately 25 minutes in a preheated 350 degree oven. Mine didn't quite take the full 25 minutes but my instructions say "30-35 minutes" so just check it and when it's golden brown and releasing from the edges, springy to the touch, remove it from the oven.  Check by inserting a knife or toothpick in the middle of the cake which should come out clean.


Frosting:

Ingredients:
  • One 8 ounce package of cream cheese
  • 1/2 stick margarine/butter (softened)
  • 1 3/4 cup powdered sugar
  • 1 teaspoon vanilla.
Directions for frosting:

Mix all well until smooth and pour over hot cake.  (I let my cake cool about 5 minutes so that it wouldn't tear during the frosting stage).  Spread well to the edges of the pan.


A sheetcake is served from the cake pan so don't try to remove it from the pan.

We add some toothpicks to the top so that any foil/plastic wrap won't stick in the frosting.  Notice this beautiful sheetcake pan that my mother-in-law got me for Christmas.  I just LOVE IT!


Enjoy!

Gina


Monday, August 19, 2013

Peach Preserves - canning


I rarely BUY anything for canning.  Its like if I buy something to can, I am defeating the purpose.  Usually if I can't get it in my garden or unless someone has a surplus and gives it to me, I just won't spend the money on an intended frugal choice.  HOWEVER, peaches are another thing!

Look at these delicious Missouri peaches!  Sure wish you could smell these because Mmmmmm, they smell like heaven must smell!


Folks in my part of the country are knee deep in canning season. I have several friends who were canning a BUNCH of salsa this weekend.  During my trip to the grocery store, my checker saw the Surejell in my basket and commented that her mom and aunt were canning lots of salsa on Saturday; that she couldn't WAIT to get home to smell it cooking!   Friday night we spent some time with friends who were planning to do a BUNCH of salsa canning on Saturday.  (They ended up canning 54 pints!  WHEW!)  

These friends casually mentioned to me that they thought I could get peaches from a local peach farm so I added to my Saturday to-do list - a trip out to the peach farm to get some peaches.  

Where the peaches cheap?  Nope!  Were they a frugal choice for my family?  Nope!  Do I care? NOPE lol!  

I decided then and there that I don't do much during the summer for recreation.  We took no vacations, not even single day vacations.  We haven't entertained much, and if I wasn't going to take a summer vacation, I decided to splurge on good summer food and it doesn't get much better than a farm fresh, juicy peach, locally grown right in my county.  They are lovely!  I bought "seconds" so that helped a little with cost, but they are so worth it!

The very first canning project that I tackled as a newlywed in 1985 was making peach preserves.  Jams/preserves/jellies are easy stuff.  They don't require tons of fruit.  If you sterilize your jars in the dishwasher, you are sitting on easy street!  I ONLY use Surejell for pectin because I have tried other products with failure.  The Surejell pectin only requires 4 cups of chopped peaches.  We're talking only about 8 peaches so get yourself some peaches and try this.  You won't regret it! (However, make sure to follow the directions exactly in the box, and which I am including here in this post.  It is important to follow the directions step-by-step to get it to work right.)

Here's how I made Peach Preserves AT HOME MY WAY:


Peach Preserves
  • 4 cups peaches, chopped/pitted fresh peaches
  • 2 Tablespoons lemon juice
  • 1 box Surejell (DO NOT USE BALL BRAND)
  • 1/2 tablespoon margarine/butter - which helps w/ foaming
  • 5 1/2 cups sugar  (MEASURE SUGAR IN A SEPARATE BOWL.)
Instructions (do not double this recipe -make additional separate batches if doing more jam/preserves than this recipe):

GET ready 7 half-pint canning jars with NEW lids & rings (rings and jars can be reused, not lids.  They  need to be NEW.)  Wash them with hot, soapy water and either sterilize in a pot of boiling water or wash in the dishwasher -leaving them in there until ready to fill jars.  I just bring mine to a boil for a few minutes and then turn them off to sit in there while I get the preserves ready.


When the jars are almost ready or have already boiled and are sitting in the completeD dishwasher cycle or boiling water, get started with the preserves.

PEEL, pit, and chop 4 CUPS of peaches.  Place them in a 6-8 quart sauce pan (allow room for the boiling to happen). 

ADD the lemon juice, Surejell powder (1 box), and butter/margarine to the fruit in the pot.  Stir well.

START cooking on medium.  Once the fruit is hot and starting to cook, USE a potato masher to mash the now hot fruit.  I don't mash all the chunks out.  Just smooth it out some.


BRING to a full rolling boil (STIR CONSTANTLY!)  (A full rolling boil is a boil that can't really be stirred down. )

DUMP the sugar all at once:


Stir good as it starts to heat back up!


BRING to a full rolling boil AGAIN and time for 1 minute (stirring often - even while it is boiling)!


REMOVE from heat.  Place your jars and lids/rings upside down on a towel close to your stove.  You will want to dry the rings/lids to avoid rusting.  


I turn the jars over one at a time as I am filling to keep everything sanitized.  Fill up to the bottom bands of the jar, add a lid, and a ring (tighten but not TOO much).  Proceed until all the jars are full.  Notice the metal canning funnel.  This makes filling the jars so much easier!  


The official directions tell you to water bath these filled jars for 10 minutes.  Personally, I don't process jams or jellies.  I turn the jars upside down for 10 minutes and then right side up to seal.  I listen for the jars to seal/pop.  However, the safest way to can jelly/jams is to use the 10 minute water bath.  (Cooking the jars in a canner or a pot with a towel in the bottom so that the jars aren't resting on the bottom of the pot), covered with water, and boiled 10 minutes.)  And I ONLY use this upside down method for jams and jellies just so you know.

We love summer peach preserves on some snowy day HOMEMADE BISCUITS!  Ooh baby!


Enjoy!

Gina