Wednesday, January 30, 2013

Making It at Home - Brown Sugar


This weekend I set out to mix up some peanut butter cookies.  I am terrible at running out of things and forgetting to add it to my grocery list.  This time, I had no brown sugar.  What to do?  (sigh!)

Lightbulb- a-ha!  I remembered that I had seen a post at One Good Thing by Jillee about making brown sugar.  I read the post with interest, but didn't expect the brown sugar that you get from combining molasses and white granulated sugar to seriously taste and "be" like store bought brown sugar. 

I LOVE molasses on Homemade Biscuits, so I had some molasses in my pantry.  I grabbed a bowl, some sugar, the molasses, a whisk, and...WOW!  It was so easy and perfect and yummy!  I loved the texture of this brown sugar.  It was perfectly moist, unlike when I have store bought brown sugar that has hardened and no amount of microwaving it really changes that.

I probably will never buy another box of brown sugar.  This is truly the way to go.

Thank you, Jillee!  As always, you are SPOT ON!

Here's Jillee's recipe and some pictures of how I made Homemade Brown Sugar AT HOME MY WAY:

 
Homemade Brown Sugar
 
  • 1 cup white/granulated sugar
  • 1 Tablespoon molasses
 
Instructions:
 
Dump the white sugar in a bowl that has some room for "mixing."  Drizzle on the molasses.  Use your whisk to fully incorporate the molassess into the white sugar. 


It mixes up perfectly with a whisk!
 
 
And it packs just like regular brown sugar - COOL!


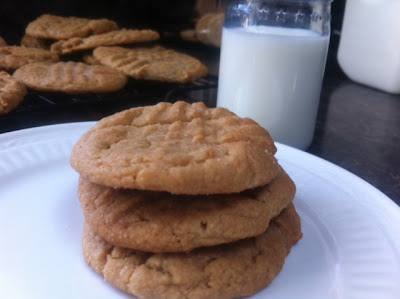
Here's a sneak peek of what I made with this wonderful Homemade Brown Sugar:


Soft and yummy - Peanut Butter Cookies
Recipe coming tomorrow!
 
 
I shared this recipe at:


Tuesday, January 29, 2013

Homemade Yogurt Parfaits


I love those yogurt parfaits you get at McDonalds or Panera.  YUM!  All of that sweet creamy yogurt, tart fruit, and crunchy granola just makes me smile.  I also love that when I eat fruit and yogurt for breakfast, I feel good!  I don't feel all full and gross, like..."why did I eat ALL of those little donuts?"  HA!  After a breakfast of fruit, yogurt, and oats, you know you have a great start to your day! 

I made a batch of Homemade Perfect Granola this weekend.  The recipe comes from Amy's Finer Things blog.  It's just SO EASY!  The smell of honey, cinnamon, and oats wafting in your kitchen will inspire you to always keep some on hand.  We eat it with milk (like cereal), on applesauce, with yogurt, and just by the handful!  I usually add some dried fruit, like cranberries, apricots, raisins.  This time I had cranberries so the parfait has quite a red & pink flair to it, perfect for this time of year!

I had some frozen raspberries in my freezer and as I am bound and determined to start eating some of my freezer stash.. I put together a yogurt parfait for eating at my desk.(I'm lucky enough that my employer allows such a thing.)  Before leaving my house, I put the frozen fruit in a jar big enough to contain the entire parfait once it is assembled, added a lid, and put it in my bag.  I bring with me a container of vanilla or flavored yogurt, some granola, a spoon, and I'm good to go!

Here, again, is my granola recipe.  It's so very easy.  No expensive ingredients, except maybe the honey and I just try to find the best deal I can on that.

Homemade Perfect Granola (Lazy Granola)
 
  • 1/2 cup brown sugar
  • 1/2 cup oil (I use Canola)
  • 1/2 cup honey
  • 1 tsp. cinnamon
  • 2 tsp. vanilla
  • 7 cups oats (I use old fashioned, NOT quick cooking), chopped pecans, sliced almonds, etc. (just make sure your combined oats/nuts only equals 7 cups)

Instructions:

Mix brown sugar, oil, and honey in a small saucepan. Bring to a low boil. Remove from heat. Stir in cinnamon and vanilla.

Mix oats and nuts in a large bowl. Pour liquid ingredients over. Stir well until well coated.

Spread in a 10×13 pan. (I use a broiler pan for this. I either spray it with Pam first or use a sheet of parchment paper - which I fold up and reuse over and over every time I make granola). Bake at 375° for 10 minutes.

Take out and stir.

Return pan to oven. Turn oven off.  Keep peeking and stir occasionally until the oven cools and your granola is the golden brown color you prefer.

Add any dried fruits after the granola is cooled. Break apart and store in ziploc bag or large glass jar.
 
 
Parfait Ingredients
 
Layer in a jar/dish:
  • Bottom layer:  Fruit
  • Second layer:  Yogurt
  • Top layer:  Granola/dried fruit, etc.


Enjoy!
 
Gina
 

Monday, January 28, 2013

Menu for the Week (1/28/13 through 2/3/13)

 
My two girls and me!  (Wishing it was that green outside right now!)
 
How was your weekend?  Over too quick is what my weekend was...  I think I need a few more days in my weekend, but here we are .. rise and shine... its Monday morning!

I did make it to the YMCA this morning!  Got a little run in.  Since my surgery, I haven't gotten back with my running schedule but this morning was a step in the right direction.  The people at the YMCA always inspire me.  I saw all types of people there this morning... young ladies who are in high school, up early for a morning run, elderly people who have health issues and who truly inspire me and make me realize that I have ABSOLUTELY no excuse not to be there, and also friends and acquaintenaces that I only see at the Y.  We support each other!  A friend this morning there told me "ugh... this didn't feel good this morning."  I told her, "yes, but we made it!  And now we can say we did it and got it done!" 

I actually got some good cooking done yesterday and some of those recipes I will post during the week.  I had some 5 Minute a Day dough in my fridge, on its last days of life, so I made some Homemade Pizza Hot Pockets with it.  My husband had one for supper fresh from the oven and I froze the rest for his lunches.  I mixed up some peanut butter cookies.  I normally don't make a lot of cookies but I had some cookie dough in the fridge the other day and having the cookies around was so nice!  I like to make a batch of cookie dough, bake a couple, and freeze the rest (dropped on the cookie sheet but frozen and bagged for baking later).  It's fun to just bake a few cookies and not have a huge baking day to stress out about when you want a quick snack.

I also had some pinto beans languishing in my fridge.  I froze those in about 2 cup portions for using as Cheese Beans or chili, or even just "beans and cornbread."  I could have let them ruin, but I felt good getting those leftovers put away for later.  Saved me money and saved them from the trash can!  I also had about one serving of my Free Soup in there.  I froze that in a canning jar for taking for lunch one day.  Ahh.... to get all that done felt so good!

Here's my Menu Plan for the week:


Breakfasts
Lunches:

  • Sandwiches (turkey or PB&J)
  • Homemade Hot Pockets (recipe coming this week)
  • Pizza cups
  • Corndog Muffins in the freezer
Supper:

Snacks/Dessert:

  • Homemade Apple Pie
  • Peanut Butter Cookies (recipe coming this week)

Saturday, January 26, 2013

Cinnamon Oatmeal Waffles


I just started making homemade mixes in my kitchen not too long ago.  I hadn't really seen the need to mix stuff up when I had the recipe and the stuff in my kitchen UNTIL one day I was making some Perfect Pancakes and ran out of eggs.  Hmm... here I was with all the dry ingredients and no eggs.  I decided to plop my ingredients in a jar to use later.  Then, fast forward to a day that I wanted to make some pancakes and "BAM" (as quoted by two of my favorite hollywood personalities, Sheldon from Big Bang Thoeory and Emeril Lagasse from the Food Network...), I had pancakes!  I had forgotten how easy having a mix was for getting stuff on the table fast.  I don't usually make a big deal out of making a mix.  I just have a few canning jars out and as I'm making pancakes I add the dry ingredients to the jars for extra batches.  It's that simple.


The recipe for the Cinnamon Oatmeal Waffles is an actual mix that you mix up a big batch of and then dole out two cup portions as your "mix".  I saw this recipe at Finding Joy in my Kitchen.  I can always depend on Sno White's recipes to be yummy!  Sno White calls the recipe "Kris Kringle Pancakes."  They are hearty and delicious! 

Sometimes I make these as pancakes but this time I wanted waffles.  I love having waffles in the freezer for toasting on busy mornings.  Yesterday I was home by myself so I made some, ate what I wanted and froze the rest for later. 


When you cook these as pancakes or as waffles, the smell of cinnamon and oatmeal is almost intoxicating!  I love them!  The batter is very thick.  I think you could add a little more liquid for thinner pancakes if you wanted.  They are a hearty breakfast and I served mine several ways.  Ha!  Yes, I had three squares of waffle (my wafflle iron makes a huge waffle that is cut in fourths.  I had some with applesauce, some with applesauce plus maple syrup, and my favorite way?  That was with maple syrup and a little scoop of peanut butter!  YUM! 

Here's how I made Cinnamon Oatmeal Waffles AT HOME MY WAY:

Cinnamon Oatmeal Pancakes / Waffles

Ingredients:
  • 4 C oats (quick cooking preferred)
  • 4 C flour (2 C each, whole wheat & reg-unbleached "white" flour)
  • 3/4 C brown sugar
  • 1 C powdered milk
  • 3 T baking powder
  • 2 T cinnamon
  • 3 tsp. salt
  • 1/2 tsp. cream of tartar

Directions

In a large bowl, combine 4 C oats, 4 C flour, 3/4 C brown sugar, 1 C powdered milk, 3 T baking powder, 2 T cinnamon, 3 tsp. salt & 1/2 tsp. cream of tartar. Mix well and add to each jar or baggy a 2-cup portion of the mix.

Add a note to each jar/baggy or print a label:

To each jar of mix, for waffles or pancakes add:
  • 2 eggs
  • 1/3 C oil (or applesauce)
  • 1 C water
  • 2 C pancake mix
To mix the pancakes/waffles.  Blend/beat eggs, add oil, water and mix well.  Pour over pancake mix and gently stir.

(Hint:  This time, AGAIN I was out of eggs.  I substituted the eggs and oil with the amount of mayonnaise that was equal to the amount of oil called for in the recipe - because mayo is eggs plus oil.  I let them sit a few minutes before cooking to "blend" the flavors.  IT WORKED LIKE A CHARM!)


Enjoy! 
 
Gina

Thursday, January 24, 2013

Juicy Burgers


I posted a great story to go with this recipe in my original post for Juicy Burgers.  It tells where this recipe came from and how long I've been making it.

My husband and kids DON'T like Manwich.  (However, I do.. and I actually found a great replica for Manwich which I posted here.)

Juicy Burgers are different than Manwich.  Of course there are similarities.  Both are made with ground beef, sauce, and buns.  But, Juicy Burger are sweeter.  They are made with a little brown sugar.  I love both of these meals!  It's a great way to stretch a little bit of ground beef and leftovers are WONDERFUL!

I made mine last night with some mac & cheese.  My husband prefers something like Oven Baked Cheesy Fries.  I love it all!

I am reposting this recipe .. because I took a picture... and because it bears repeating!  This is a delcious meal!

Here's how I make Homemade Juicy Burgers AT HOME MY WAY:

Juicy Burgers
  • 1 1/2 pound ground beef
  • 1 (8oz) can tomato sauce (not spaghetti sauce)
  • 1/4 cup brown sugar (I don't pack mine)
  • 1/4 cup ketchup
  • 1 teaspoon onion powder
  • 1 teaspoon prepared mustard
  • 1/4 cup water
  • Salt/Pepper as you like

Brown the ground beef in a skillet. Drain. Add remaining ingredients and stir, simmer about 15-20 minutes until thick and bubbly. Serve on buns, sandwich bread, or whatever you like. Toast the buns for an extra treat.
 
*I scoop leftovers on flour tortillas, individually wrap, and place in the freezer in a gallon ziploc bag for terrific lunches on the go.

Wednesday, January 23, 2013

Easy English Muffins


Last Friday I made a bowl of dough for use in making Homemade Pizza.  We had pizza again Monday for supper because we LOVE it so much!  I still have some dough left.  I plan to make some homemade hot pockets with it and this morning, as I was getting ready for work, packing my lunch, I browned a couple of homemade English Muffins for breakfast.  They are so quick and easy to make and Oh SO GOOD!

I have previously posted the recipe and instruction for the 5 Minute a Day - No Knead Bread recipe with my homemade pizza post, but I'll post it here - in less of a wordy fashion so that you can truly see how easy it is to bring together.  I use it for everything!  I got my recipe and instructions from an article at Mother Earth News here. I cannot say enough about how that recipe totally revolutionized my kitchen and cooking options.  The chefs who created the recipe (and authors of great cookbooks) have wonderful recipes in cookbooks everyone should read!  Please see details for the cookbooks and even the authors' blog for these revoluntary recipes.  
5 Minute a Day Bread Recipe
(English Muffin instructions to follow)
(Needs to be refrigerated overnight.)
 
 
  • 3 cups very warm (hot but no hurt) water
  • 2 teaspoons yeast or one packet
 
1.  Mix those together (in a separate container from the flour/salt large mixing bowl) and let the yeast come alive.  A foam on top will form - for a few minutes while you are getting the dry ingredients ready.
 
 
  • 6 1/2 cups all purpose flour (Remember not to get your flour straight from the flour bag.  Dump the flour in a big bowl/cannister.  It should be "fluffed".)
  •  
  • 1 Tablespoon salt (the original recipe calls for more - this is what is good for us and I use regular table salt.)
 
2.  Combine the flour + salt in a very large mixing bowl (in a separate bowl from the water/yeast).  Stir to mix through.
 
3.  Dump the now foamy yeasty water over the flour/salt mixture.  Stir with a big spoon until all blended.  Just a few good stirs.  This should come together in less than 30 seconds.  It will be stiff.  Just a big shaggy dough.  Nothing you could form into a ball because it would be too sticky.
 
 
4.  Place LOOSE plastic wrap over the container (or I use a clean Walmart bag).  Then, place the dough in the fridge until the next day.
 
 
5.  That's it!  Seriously!
 
 
The dough will rise to the surface and be flat across the bowl the next day.  Anytime you want to use dough from the bowl, sprinkle with flour first.  Now you can make pizza, hot pockets, and these English Muffins!


English Muffin Ingredients/Directions:
 
Ingredients:
 
5 Minute a Day dough from the fridge
plain yellow cornmeal (this keeps the dough from sticking in the pan.)
a non-stick skillet works best but cast iron will also work
 
Directions:
Remove your dough from the refrigerator.  I have used some out of my bowl.  Mine looked like this - this morning.


Sprinkle the top of dough lightly with a sprinkle of flour.
 
Get out a saucer/small plate.  Put some cornmeal on the plate.
 
 
Remove a small piece of dough from the bowl.  Just a piece that would fit in the palm of your hand.  Make a disc shape.  Flatten it on the plate of cornmeal until as flat as a cookie.  (If they are too fat the middle doesn't cook.)  Flip, pat again so the other side is covered in cornmeal.


Place the discs in a skillet.  (No cooking spray/oil is needed.  The cornmeal prevents sticking in a non-stick or iron skillet.)  But if it makes you nervous a little cooking spray won't change much.


Turn the skillet on to med/high.  Cover with a lid, and then turn down a little to medium.


Let them cook with a lid 5-7 minutes until they swell up and the underneath is cooked.  Here's a picture before I flipped mine.  They should have brown spots on the cooked side.


Cook the other side until done as well (with the lid).
 
Let them cool just a bit before splitting.  (To properly split an English Muffin you poke a fork all around the sides and then pull it open.  This leaves perfect craters for honey, jelly, mollasses or butter!)
 
These are great leftover and toasted the next day!  So easy, frugal and delicious!  These are keepers for sure!


Tuesday, January 22, 2013

Banana Pudding Rice Krispie Treats


Last night I made Homemade Pizza for supper.  It was so wonderful!  I also tried out a new recipe that I found at the Sweet Southern Blue blog for Banana Pudding Rice Krispie Treats.   WHAT????  I know that sounds like a surprising combination.  I couldn't discover a wonderful snack idea like that without giving it a try.  You see, I love everything banana, the "real" banana recipes like Banana Nut Bread Baked Oatmeal, or plain muffins with mashed banana, Perfect Pancakes with bananas or even Tin Can Banana Bread, but also any "fake tasting" banana treats like Laffy Taffy or Banana Moon Pies.  Yes... I do LOVE those huge-a-mongo triple decker Banana Moon Pies! 

These treats tasted very similar to Banana Moon Pies.  They were easy to make and a fun snack to offer when you are looking for something different.  I think it also might be fun to try other pudding mixes combined with rice krispie snacks.

*Disclaimer:  My picture is HORRIBLE!  The picture at the Sweet Southern Blue blog is so beautiful!  I almost feel embarrassed to post my picture but "it's all I've got."  So, click over to the Sweet Southern Blue blog so you can truly see what a beautiful blog picture looks like! It is inspiring!  It makes this snack look as delicious as is really is. 

Here's how I made Banana Pudding Rice Krispie Treats AT HOME MY WAY:

Banana Pudding Rice Krispie Treats
 
Ingredients:
  • 6 cup Rice Krispies
  • 1/4 cup of butter or margarine
  • 10 oz bag mini marshmallows
  • 1 small box of banana cream instant pudding mix
Instructions:
 
Place 1/4 cup of butter/margarine in a large/med microwave proof dish.  Micro just until the marg/butter is all melted.  Add the entire 10 oz bag of mini marshmallows.  Micro again until all the marshmallows are either melted or are so enlarged that they just need a stir to be melted.  Blend well until smooth.  Dump the box of banana cream instant pudding mix into the marg/butter/melted marshmallow mixture.  Stir until all is well blended.  Add in the 6 cups of rice krispie cereal (or generic is fine).  Stir as best as you can.  (I never like the stirring part of making rice krispie snacks.)
 
Dump into a buttered 9 x 13 pan (or a little smaller) and press with the bottom a small cup that has been buttered until all flat. (That's my tip for flattening them without getting your hands sticky.)  OK.  Let cool a little bit and they're ready!


Thursday, January 17, 2013

Pot Roast with Little Dumplings


I made a delicious Pot Roast last Sunday with little dumplings  (pictured between the green beans and the bread).  It's another of my husband's favorite meals.  I don't usually buy rump roast because it's so expensive but this was a nice one, not too high of a price, and my husband ate sandwiches from the leftover roast all week, so how can that be a bad thing, right?  (I also used the remaining leftovers for my free soup today-Thursday.)

I typically make roast in the oven or in the crockpot.  I have read some information that you can use your crockpot all day and use less energy than using your oven for a couple of hours.  That sold me there so I used my crockpot.

Our family loves "Little Dumplings" made with the roast gravy.  It's so easy that it's silly really.  I have, on occasion, either when I was being super frugal or didn't want to make a run to the store, used homemade dumplings (from my Chicken & Dumpling recipe) (cutting them in small squares) and they are awesome!  But, this time I used a couple of cans of cheapo canned biscuits.  I think my husband likes the dumplings almost as much as he likes the roast and that's really saying something because he loves meat!

Here's how I make Pot Roast with Little Dumplings AT HOME MY WAY:


Pot Roast with Little Dumplings
(crockpot or oven) 
 
  • Roast of your choice (rump, chuck or even round steak/stew meat)
  • 1 can of cream of mushroom soup + 1 1/2 can of water
  • 1 teaspoon Kitchen Bouquet (optional) (makes a deeper gravy)
  • 6 large potatoes (or however many you need), peeled and cut in thick slices the length of the potato
  • Peeled, carrots or baby carrots (fresh)
  • 1 teaspoon Onion Powder or a sliced small real onion
  • *Quartered cabbage is also good cooked with roast.
  • 2 cans of cheapest canned biscuits
 
Instructions:


Place the meat in the crockpot or baking pan.  Place the potatoes/carrots (cabbage if you want) on top and any onion powder/onion.  Add the can of mushroom soup, 1 1/2 can of water (add the Kitchen Bouquet to the can of water to dissolve well). 
 
(I usually blend the soup + water in a separate container until smooth with the Kitchen Bouquet and then dump it on top of the meat/vegetables.) 
 
Cook on low (if in crockpot) 8-10 hours.  If in the oven, I bake on 350° for about 2 hours or until the meat is fork tender.
 
To make the dumplings:
 
Carefully dump the broth/gravy off the roast into a med/smal saucepan (like you would cook mac & cheese in) (I usually crack the lid to do this - CAREFULLY!)
 
You want at least 3-4 cups of liquid in the pot.  The gravy is very condensed so if you need to, add enough water to make sure the pot has enough liquid to cook dumplings.  Bring to boil.
 
Pinch each biscuit into about 6-7 pieces and place in the boiling broth.  Move them gently to add more pieces to the boiling gravy and not on top of other dumplings.  Turn to medium, add a lid/cracked, and only gently stir until the dumplings are done (5-10 minutes or so).


ENJOY!

Wednesday, January 16, 2013

Parmesan Chicken

 
I decided to scratch the Hawaiian Chicken that I had on my Menu Plan this week in favor of Parmesan Chicken which my husband and daughter are particularly fond of.  I also served some salad with Homemade Ranch Dressing (homemade croutons) and used some leftover buns for garlic toast.

This recipe has a history and I cannot post about it without mentioning the memories attached to this recipe.

My husband and I married young.  He was 20, I was 18.  We had only lived at home with our parents so needless to say, cooking wasn't something he nor I had much knowledge of.  Another teeny problem was that we only had a microwave (a wedding gift) and we did not have a stove for many months after our wedding.  In the cookbook that came with the microwave I found a recipe for Parmesan Chicken.  My very picky hubby somehow agreed to try Parmesan Chicken.  He had never even eaten spaghetti.  We're talking some serious food issues LOL!  Apparently this recipe was a success, because I am still making it today!

I have made this recipe just about every year for our anniversary.  I now no longer need a recipe.  We've been married 27 years.

Also, I no longer make it in the microwave.  It served its purpose but I would never choose to cook meat in the microwave, ha!

When I make this recipe, I cannot help but remember where this recipe came from, and how young I was when I used to make it.  It will always be a very special meal.

Here's how I make (super easy) Parmesan Chicken AT HOME MY WAY:

Super Easy Parmesan Chicken
(Double if you are baking in a 9x13 - my recipe below only feeds about 4 people.)
 
Ingredients:
 
 
  • 6-8 (thawed) boneless/skinless chicken tenders or breast portions cut in half to make tenders
  • Seasoned canned bread crumbs (you could make your own)
  • Parmesan Cheese (canned)
  • 1 15oz can of tomato sauce or spaghetti sauce of your choice
  • (If using tomato sauce, you will need seasonings; I use approximately 1 teaspoon of garlic powder + 1/4 teaspoon basil+a little salt/pepper.  If you are using prepared spaghetti sauce, you don't need any seasonings.  We prefer this meal with canned tomato sauce seasoned by me)
  • 2 cups grated mozzerella cheese
  • Cooked pasta - we use ziti or penne pasta
Directions (Preheat oven to 350°):
 
  • Combine app. 1 cup bread crumbs with 1/2 cup canned parmesan cheese.  Dredge the chicken pieces coating on all sides.  Place the chicken pieces in a sprayed casserole dish.  It's okay if they touch each other or are squished in the pan. 
  • Place the coated chicken pieces in the oven (at 350°) for approximately 30 minutes (uncovered).
  • If the chicken looks its cooked/browning, remove the pan from the oven. 
  • Dump on tomato sauce + seasonings (give a little swirl/stir) or the prepared spaghetti sauce - pouring all over the chicken pieces.
  • Place back in the oven (uncovered).
  • Start your pasta water and let the sauce/chicken bake while you are cooking the pasta (it should bake another 20 minutes or so due to the combined time of bringing the water to a boil and boiling the pasta).
  • Right before draining the pasta, remove the sauce/chicken from the oven and sprinkle with grated mozzerella.  Place the pan back in the oven (uncovered) to melt the cheese.
  • Drain the pasta, add a little oil/margarine (I use about 2 T. of margarine), and stir the pasta.
  • All done - serve Parmesan Chicken/Sauce over pasta.
  • Make sure to save ALL the leftovers.  They are excellent warmed up.
 

Tuesday, January 15, 2013

Homemade Croutons

 
Homemade Croutons
 
The other day I splurged at Panera.  I bought a delicious loaf of Asiago Bread.  Oh man!  It was wonderful and made delicious sandwiches with turkey, honey mustard, and lettuce/tomato.  (I need to further my quest for being able to make this AT HOME MY WAY!) 

I had a few slices left that were a little TOO crusty and stale, but I just couldn't let that wonderful sharp cheesy bread go to waste.  I decided to cut it into cubes and toast it into croutons.  This way my bread would never need to be tossed out.  It would forever be in the holding pattern for bread that is known as Homemade Croutons. Ha!

Homemade Croutons are super easy!  This bread already had plenty of flavor so I didn't butter it, drizzle it with oil or season it in any way.  I just cubed the bread, spread on a baking pan and baked until crunchy.

These croutons will go great with a fresh green salad and some Homemade Ranch Dressing.  They would also go wonderfully tossed into a hot bowl of soup, either homemade or canned.

Here's how I make Homemade Croutons AT HOME MY WAY:

Homemade Croutons
 
  • Any bread or any type buns nearing the end of its life
  • Butter/margarine/oil - (optional)
  • Seasonings like garlic powder, italian seasings, onion powder, etc. (also optional)
Instructions:  Preheat oven to 350°.  If using margarine/butter, spread on slices of bread/buns.  Using kitchen scissors/shears, cut the bread into cubes.  If using oil, toss the bread cubes in a little drizzle of oil (I do this in a big bowl).  Sprinkle with seasonings of your choice.  Bake until toasting nicely.  Remove from oven.  Cool completely before placing in a jar for storing.

Monday, January 14, 2013

Homemade Ranch Mix & Dressing


I have been seeing homemade ranch dressing recipes all over the place.  I love the idea!  I just never seem to get it done.  This weekend I decided to tackle it!  Especially after seeing the reviews at this blog post (at the Crafty Blog Stalker) which I saw pinned on Pinterest.

I had all of the spices I need except parsley and garlic salt.  I grabbed the cheapest generic spices I could find, which by the way was not at the biggest box store we all know of! 

I stopped by this big box store because it's closest to my house but WATCH OUT.  This store wanted 20 cents more for their generic spices than for the name brand.  The generic spices were way down on the very bottom rack and I almost had to lay down on the floor to see back in the rack (grr!).  I picked up the name brand spices and headed to the dairy section and they were out of buttermilk - none!  Not a carton to be found.  One more item on my list was less expensive than the generic equivalent and at that point, I had had it!  No more shopping at that place (if I can help it)!  I put my stuff back and headed down to the local grocery story where I found everything on my list, with savings of at least 50 cents per spice for the generics.

OK - enough venting!

I was very excited to try this mix!  We make lots of things with ranch dressing mix packets, like dip, dressing, adding it to potatoes, crackers, etc.  This homemade mix will save lots of money! 

I am happy to say that it is WONDERUL!  We are rather picky about ranch dressing.  We want a savory, salty dressing not the least bit sweet tasting.  This is perfect!  It just has this wonderfully fresh and delicious smell that I cannot describe to you. 

I also think this dressing would be terrific with a little feta or bleu cheese mixed in.  It would also be a great gift. 

Here's how I made Homemade Ranch Mix & Dressing AT HOME MY WAY:

(This mix makes a huge amount and the original recipe made a large amount of dressing.  I wanted to try a smaller amount of mix to make sure we liked it so I cut the recipe in half - for the mix and the dressing.  I still have a whole bunch of dry mix leftover!)

 
Homemade Ranch Mix & Dressing
(I halved this recipe for my batch.) 
Ingredients:
 
Black Pepper ¼ cup
Parsley Flakes 1 1/2 cup
Garlic Salt ½ cup
Salt- 2 teaspoons
Granulated Garlic ¼ cup
Granulated Onion 3/4 cup
Dill Weed 2 Tablespoons
 
Procedure:
  • Combine all ingredients, store in an airtight container. (I used a canning jar - shaking well.)  Makes about 3 ½ cups of dry mix

  • To Make Dressing, whisk together 2 T of mix with 2 Cups of mayonnaise and 2 Cups of buttermilk, 1 ½ Cups sour cream, & 1 t Lemon Juice. Refrigerate for 2 hours. Makes 1 ¾ Quarts  (I only used 2T of sour cream because I thought it looked plenty thick & creamy.)  I stirred well with a whisk until all creamy!  Refrigerated overnight for a marvelous dressing this morning!

I found this recipe via Pinterest at:

button


Sunday, January 13, 2013

Sunday's Menu Plan for the Week!

I'm trying to get organized around my house.  No better thing to focus on than the menu plan, which saves $$, saves time, and is better over all for my family!

I spent today (Sunday) making a few things to make our menu a little more lively.  I made homemade chocolate pudding for snacks or dessert, homemade bread for supper and sandwiches, homemade croutons for salads/soup, and some homemade ranch dressing for dipping and salads (new recipe I'm trying).  So far I have a great start to the week and that should make getting out of bed in the morning a whole lot easier!

Here's my Menu plan for the week starting Sunday, January 13 - AT HOME MY WAY:

Menu Plan (starting Sunday, January 13, 2013)
 
 
Breakfast items:
 
  • Homemade quick oats oatmeal with fruit/brown sugar
  • Zucchini bread (recipe coming this week)
  • Small batch raisin bran muffins (recipe coming)

Lunches:
 
  • Tomato soup with HM croutons (crouton recipe coming)
  • Tossed salad with HM ranch dressing and HM croutons (dressing/mix recipe coming - this dressing is delicious!)
  • Sandwiches with (gift) honey mustard, veges & HM ranch dip

Suppers:
 
  • Pot Roast with potatoes, carrots, and little dumplings (Sunday Dinner) (recipe coming soon)
  • Tacos with cheese beans (recipe coming)
  • HM baked chicken strips with salads/HM ranch
  • Hawaiian Chicken with rice, pineapple salad
  • HM Pizza
  • Free soup (leftover roast, veges, more veges from the freezer), crusty bread (same dough as HM Pizza) 

Snacks:
 
I have lots of cushion in this menu plan.  We have lots of leftovers from the Sunday Pot Roast.  We can have roast beef sandwiches on HM sandwich bread or just warmed up leftovers from this meal.  I may not need all of the suppers in this menu plan but they're here if I need some inspiration!


Friday, January 11, 2013

Homemade Cheeseburger Helper that is RIGHT ON!


One of the most dependable food blogs for recipes that I can think of is Lynn's Kitchen Adventures.  I can always depend on her recipes to turn out perfect!  Last night I tried Lynn's recipe for Homemade Cheeseburger Helper

I had my doubts, ha!  I had seen similar recipes before but I just could not imagine that a recipe with TOMATO SAUCE in it could really taste like the Cheeseburger Helper my family LOVES from the box (eek!).  I thought maybe Lasagna Helper or one of the other flavors but surely not Cheeseburger Helper.  I decided last night to give it a shot.  It could not have been more PERFECT!  Lynn!  You really nailed it.  And, I cannot thank you enough for this delicious, easy, super cheap and EXACT replica of Cheeseburger Macaroni.

I say its an EXACT replica!  But it's even better.  Ya know how?

  • It's CHEAPER!  I figure I spent less than $1.00 on the ingredients I used to make this (not counting the hamburger, which I would also have to buy with the storebought box mix for Hamburger Helper).
  • It made about 3 TIMES MORE! than the box would make.  That makes it a super good deal!
  • It didn't have any of those weird ingredients in it!  I knew exactly what was in our supper!

I did not buy a bag of grated cheese.  Those things have some kind of powder in there.  Ick.  Not for me.  I bought one of those little rectangle of cheddar and grated up less than half of it. 

One hint:  measure the macaroni in a DRY cup measure.  I measured mine in a liquid measuring cup and I had a little too much.  I was worried my macaroni didn't have enough liquid to cook properly so I added about 1/4 cup milk and 1/4 cup of water after mine looked like it needed a little "juice."

Also, I didn't use a full pound of hamburger.  I keep small portions of cooked hamburger in my freezer and I probably only used 2 cups of cooked burger, which made it extra frugal.

Here's how I made Homemade Cheeseburger Helper AT HOME MY WAY:

Cheeseburger Helper

  • 1 lb ground beef (I used about 2 cups cooked frozen burger from my freezer.)
  • 1 cup beef broth ( Lynn makes this using a bouillon and water) (I used bouillon cube + water - from Aldi.)
  • 1 3/4 cup milk
  • 8 ounces tomato sauce (One of those short cans is 8 ounces.)
  • 2 cups elbow macaroni (A little less would be fine also.)
  • 2 Tablespoons sour cream (optional) (I added just a couple of spoons and stirred it in.)
  • 1 ½ cups shredded cheddar cheese (I grated my own for more $$$ savings.)
  • Salt to taste (Not much salt is needed.  The bouillon and cheese are plenty salty.)
Directions:
  1. In a large sauce pan brown the ground beef. Drain any fat from the meat.
  2. Add the beef broth, milk, and tomato sauce to the meat and bring to a boil.
  3. Add the macaroni noodles.  Stir often.  These tend to try to stick to the bottom of the pan.
  4. Reduce heat to low. Cover and cook for 17-20 minutes. Test at 17 minutes to see if the pasta is done. If pasta is not done, cook a few minutes longer.
  5. When the pasta is tender and done, stir in shredded cheese and sour cream if using.
  6. Let sit 5- 10 minutes before serving and it will thicken more.


This recipe shared at:

button


Thursday, January 10, 2013

Sticky Buns - Easier than Cinnamon Rolls


Sticky Buns
 
 
I normally make homemade cinnamon rolls for Christmas morning at our house.  This year, I decided to take a few shortcuts.  The first thing I did was make my dough in my bread machine.  (You can use the same recipe and just do it without a bread machine, but I let my bread machine do the mixing and rising for me just to save time.) 
 
I use the same recipe as I do for my Schoolhouse Dinner Rolls except that I add a blended egg to the liquid ingredients for a richer dough.  This is the exact same recipe that I use for my cinnamon rolls 


The only difference is that you roll the dough into balls instead of rolling the dough out, spreading on butter and cinnamon/brown sugar, and cutting them.  I made my dough balls with buttered hands, rolled each ball in cinnamon sugar, and then placed the dough balls in a pan, the bottom of which was spread with melted butter/margarine, a little brown sugar, milk, and pecans.  It's like you are making monkey bread just in one layer like a pan of dinner rolls.  Am I making sense?
 
Here's how I made Sticky Buns - Easier than Cinnamon Rolls AT HOME MY WAY:
 
 
DOUGH RECIPE:  (Bread Machine instructions for making the dough)
  • 1 1/3 cup very warm water (hot but no hurt)
  • 1 packet of yeast (or 2 teaspoons)
  • 1/4 cup white sugar
  • 1/4 cup oil
  • 1 egg (slightly beaten before adding to the other ingredients)
Instructions: Measure the water in a 2- cup measuring cup, add the sugar and yeast. Stir very gently and set a timer for 10 minutes. Let this get all foamy for 10 minutes. Then, add 1/4 cup of oil (vegetable, canola or olive) and the slightly beaten egg to this mixture. Stir very gently, then dump  into your bread machine pan (liquids go first).

Next add 4 cups all purpose flour to your bread machine pan
and 1 teaspoon salt.

Set your bread machine to the dough setting. (Mine takes 2 hours.)
When the dough setting is complete, proceed as below by forming rolls, etc.


TO MAKE THE STICKY BUNS:
 
I used only half of my dough and made a 9" round cake pan of rolls.   For using all of the dough, you would need to increase the amount of ingredients for the sticky in the bottom of the pan.
 
In the bottom of the pan of your choosing (needs to have sides like a cake pan),
  • Melt 1/2 stick margarine - swirl all around to cover the bottom of the pan.
  • Sprinkle with brown sugar - (I used about 1/2 cup)
  • Add 4 T. milk.
With a fork blend this mixture together so that it covers the entire bottom of the pan.
  • Sprinkle with pecans.
  •  
Using the Dough:
  • Using very buttered hands, roll dough into balls the size of a ping pong ball. 
  • Roll each buttered ball in a mixture of cinnamon sugar (To a cup of sugar, use 1 teaspoon cinnamon).
  • Place the balls on top of the melted ingredients (and nuts) in the bottom of your cake pan (not quite touching each other).
  • Sprinkle the remaining sugar/cinnamon around on the dough balls in the pan.
Let the dough balls rise in warm place until doubled.
 
  • Preheat oven to 350°.
  • Bake 25-30 minutes or until golden brown.
Let cool only 5 minutes.
 
  • Place a serving pan/cookie sheet over the baked rolls and using potholders to protect your hands, flip the rolls out of the pan they were baked in.  You may have to scoop out some of the yumminess left in the bottom of the pan and put it on your rolls.
GOBBLE THEM UP!  My family loved these rolls.  They were so much easier and actually lighter since they didn't have all of those heavy ingredients inside the rolls plus frosting.  I hope you try them!