Tuesday, April 30, 2013

Skillet Lasagna - Cooks All in One Skillet


We LOVE lasagna at my house.  I normally make a big pan of it, after MAKING homemade sauce, boiling noodles, and placing ALL OF THAT in a big baking dish.  It's a lot of work but normally we all think that it was worth all of old Mom's work because we all love it (in spite of all of that work and dirty dishes) and we eagerly eat up all of the leftovers.

Since I have been on a pinning frenzy lately on Pinterest, I found this terrific idea for Skillet Lasagna.  Boing!  Why hadn't I thought of that?  It only makes sense that you can cook lasagna all in one skillet just like you do when you make Homemade Cheeseburger Helper

My family likes a pretty stripped down version of lasagna.  They want meat sauce, pasta, and mozzerella.  That's it. I took the recipe that I originally pinned and tailored it just a little bit for my own family.

I found the original recipe for Skillet Lasagna at Cooking with Libby.  Libby's pictures are WAY better than anything I could ever hope to take. This is a delicious, easy, and super quick way to put something on the table that the entire family loves.  Libby uses a layer of a cottage cheese/cream cheese/parmesan cheese mixture that sounds perfectly dreamy and creamy to me but remember that my family wants "stripped down" lasagna (ha!).  I bet it's super duper yummy with that in there though and I would love to try it sometime.  I have to remember thought that my hubby did not grow up eating lasagna so I count my lucky stars that I can have it at all..ha-ha!  But, I want to give a special shout out to Libby for inspiring me with this terrific idea!  It's just wonderful!

I keep jars of my own homemade meat spaghetti sauce in the freezer.  I make a big pot and then freeze the leftovers for later.  The recipe for my homemade spaghetti sauce is HERE.  But I won't always use homemade sauce.  I expect fully to make this recipe with jarred spaghetti sauce (my favorite is at Aldi).

Here's how I made Skillet Lasagna AT HOME MY WAY:

 
Skillet Lasagna (as adapted from Cooking with Libby)
 
  • 1 pound ground beef
  • 1 (24 oz) jar of spaghetti sauce (homemade or purchased)
  • 1 1/2 cups water
  • 7-9 lasagna noodles (uncooked)
  • 1/3 cup parmesan cheese (optional) (omit if using creamy layer)
  • 2 cups grated mozzerella
 
Optional creamy layer as found on Cooking with Libby
  • 1 (16 oz.) container low-fat cottage cheese
  • 1 (8 oz.) package third less fat cream cheese (softened)
  • 1/3 cup grated Parmesan cheese
  • 1/4 cup sliced green onions
  • 1 tbsp. dried parsley flakes
 
Directions:
 
Brown ground beef, drain, add the jar of sauce, water.  Stir well, Add pasta (broken into thirds or fourths) (I used 9 pieces of pasta) so that it fits all in the pan.  Bring to a simmer, stirring occasionally so that the pasta doesn't sink to the bottom and stick.  Cook with a lid approximately 15 minutes with the lid on (stirring occasionally) until the pasta/sauce looks like this:


If using the optional "creamy layer", combine those ingredients and dollop/spread over the cooked sauce/pasta. 
 
 
Top with grated cheese:


Turn the burner off, cover, and let the cheese melt.


Remove from the burner, let sit 5 minutes before serving.


I served mine with a little baby spinach/Homemade Ranch dressing. It was a feast!
 
 
Enjoy!
 
Gina


Monday, April 29, 2013

Homemade Angel Food Loaf


The other day I pinned a terrific little find, a recipe for Homemade Angel Food Cake Loaf.  I was so excited about this recipe!  I often gaze lovingly at those little loaves of angel food cake when I'm grocery shopping but the "cheap" in me just cannot fork out over $3 a pop for those little babies.

My husband's aunt used to make homemade angel food cake.  I have her recipe.  It seems deliciously exotic and a recipe only reserved for the professionals.  I have an angel food cake pan.  You know.. one of those tube pans with the legs that shoot out (because an angel food cake cools upside down in its pan, hovering in the air so that it doesn't loose is fluffiness.  Whew!  All of that seemed complicated to me. In fact, it was really one of those bucket list recipes that I was going to try, SOME DAY...

Well, fast forward to today (yesterday actually) when I read the recipe at a blog called Cooke's Frontier.  It didn't seem that difficult and the directions were terrific!  Considering I still have a full dozen eggs leftover from Easter that needed to be used pronto, I dove right in.

This little loaf cake turned out perfect and it has way more than any store bought loaf of angel food cake could ever offer!  It is moist and light, and... I could go on and on!  Was it hard?  No way!  I followed the directions on the blog and I had no problem.  It was simple. 

I did not change a thing about this recipe.  I made it exactly like Cooke's recipe, but I do want to save this recipe here on my blog and share it with anyone else who might like to try it. So I'm posting it!  But a big shout out THANK YOU to Cooke's Frontier for this terrific recipe.

Jump on in there and knock this one off of your bucket list.  You will no longer have to pay oodles for those little angel food cake loaves.  The options are endless with this little cake. Drizzle it with glaze, ladle on some fruit (I particularly like strawberries, canned mandarin oranges or peaches), or just eat by the hunk like I did last night.  One slice will not be enough!

Here's how I made Homemade Angel Food Loaf AT HOME MY WAY:

Angel Food Loaf
  • 1/2 cup flour
  • 2/3 cup powdered sugar
  • 7 egg whites
  • 1 teaspoon cream of tartar
  • 1/4 teaspoon salt
  • 1 teaspoon vanilla
  • 1/2 cup sugar

Line the bottom of a loaf pan with a piece of parchment, leaving the sides alone (I did not have any parchment and so I didn't use any.). Don't grease the pan,  not even the bottom.  (I used a metal pan which I think you need to use - do not use a glass loaf pan.) You want the angel food to climb up the side and have something to stick to.
 
Preheat the oven to 400 degrees. Sift together the flour and powdered sugar. Sift 3 more times and set aside. (I used a hand held strainer and just tapped the side of the strainer with my hand over a bowl to sift.) 
 
In another bowl, beat the egg whites, cream of tartar, salt and vanilla until the whites begin to increase in bulk and look like foam.


Beat in 1/4 of the sugar at a time and continue to beat until the egg whites will hold a soft peak. They should still be glossy and not look dry.


Sprinkle 1/3 of the dry mixture over the egg whites and gently fold it in (do not use the mixer at this point - but fold using a spoon). Repeat 2 more times until all of the dry mixture has been folded into the egg whites.
 
 
(I'm folding in this picture.)
 
 
Scoop into your loaf pan and bake for 25-30 minutes. (Mine took 25 minutes.) The cake will be golden brown.


 Leave the cake in the loaf pan and turn it upside-down on a cooling rack to cool completely.


Once the cake/pan was completely cool, I used a knife to poke around (slide the knife) along the edge of the pan to loosen the cake from the sides.  Then I used a long fork to slightly life the cake bottom up by poking the fork down along the sides of the pan.
 
 
It came out fine, I think.


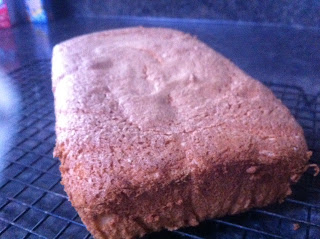
I flipped it over and here it is.  I couldn't wait to try it!  (Remember that slicing works best with an electric knife or serrated knife.)


Here's what I made with my Homemade Angel Food Loaf:


Strawberry shortcake with Homemade Whipped Cream


And.. what to do with all of those yolks, you ask?  Why, homemade pasta/noodles of course!

This recipe has been shared at:
 
Jam Hands


Blessed with Grace

Sunday, April 28, 2013

Menu Plan (week of April 29, 2013) and Sunday Pot Roast


This Sunday was a pretty relaxed kind of day.  A Sunday Pot Roast kind of day..  Our day started with lots of clouds and cool temperatures.  Our weather people had predicted sun and 70's and I was a little depressed to discovered more clouds and cool temps for all of the morning and into the afternoon.  Thankfully, it warmed up and the sun came out by about 2PM.  Hurray!  I needed some sunshine!

This week my menu plan will consist of:

Breakfasts:


Blueberry muffins using the recipe here
with blueberries instead of chocolate chips


Lunches:


Sandwiches/PB&J
 
Leftover sandwiches w/ Sunday Pot Roast
 
Suppers:
 
Skillet Lasagna (new to me)
Burgers with Baked Cheesy Fries
Crockpot Chicken Parmesan (new to me)
Breakfast for supper (ham & Perfect Pancakes)
 
 
and


Homemade Pizza!
 
We had this Sunday Pot Roast for supper today (Sunday). 
 
It's nothing special but tastes delicious and made "my man" a very happy man indeed!
 
Here's how I made Sunday Pot Roast AT HOME MY WAY:
 
 
In an oven safe pot or pan (with foil or a lid to cover), place the roast, sliced, peeled potatoes, carrots, onion, salt & pepper in the pot/pan.
 
Mix 2 cups water with 1/2 teaspoon kitchen bouquet (found at the grocery store near the worcestershire sauce, etc.), or a can of cream of mushroom soup, or a packet of beef gravy mixed with water.  Pour over the meat & potatoes.
 
Bake at 350 degrees for about 2 1/2 hours or until the meat is fork tender. 
 
Careful when you remove the lid/foil.  The steam will burn ya!
 
 
Enjoy!
 
 
Gina


Tuesday, April 23, 2013

Fluffy Hot Homemade Rolls - Yum!


I have already posted this recipe but it is so good!  Since I made a couple of pans of Schoolhouse Rolls for a potluck luncheon this morning for work, and I got a good picture, I am reposting this delicious recipe.  I never know what to make for those things and one of the girls at work requested hot rolls since she knows I love to bake bread.


Hot rolls make a perfect potluck dish.  They are frugal, use mostly pantry ingredients, but are much appreciated by folks who don't have someone at home making homemade rolls.

  • I made the dough in the bread machine using this recipe:


SCHOOLHOUSE DINNER ROLLS

(Bread Machine instructions)

  • 1 1/3 cup very warm water (hot but no hurt)
  • 1 packet of yeast (or 2 teaspoons)
  • 1/4 cup white sugar

Instructions:
 
Measure the water in a 2- cup measuring cup (which will allow for adding additional ingredients without dirtying more dishes), add the sugar and yeast. Mix well/gently and set a timer for 10 minutes. Let this get all foamy for 10 minutes.

To the water/yeast/sugar mixture, add:
 
  • 1/4 cup oil (vegetable, canola, or even olive oil is fine)
  • 1 egg
Mix well/gently to incorporate the egg.
 
Add these ingredients first to your bread machine pan, then add:
  • 4 cups "fluffed" all purpose flour (just fluff with a spoon before measuring)
  • 1 teaspoon salt.

Set your bread machine to the dough setting. (Mine takes 2 hours.)
When the dough setting is complete, proceed as below by forming rolls, etc.
  • Form the rolls with buttered hands and placed them in sprayed pans.
  • Cover with foil and place them in the fridge overnight.
For my covered dish luncheon, to be able to get out of the house on time, I did the following:
  • The next morning, I took the rolls out of the refrigerator at about 5:30 AM, uncovered them, and let them come to room temp (they had risen in the refrigerator).
  • Turned on the oven to preheat to 350° at about 6AM and got in the shower.
  • I placed the rolls in the oven to bake after I got out of the shower but before I started the "doing of the hair and makeup."
  • When they were done, I didn't cover them completely until after I drove to work because covering them tightly when they are that hot would result in soggy rolls... and we don't want soggy rolls.

My husband's only complaint was that he thought we should have put them in the trunk because he and I ride to work each morning and he had to smell those delicious hot rolls all the way to work. HA!  Poor guy!

Monday, April 22, 2013

Lunch ideas - Egg Salad Sandwiches


Mondays.  Ugh.... If it's not enough to have to go BACK to work and leave the comfort of home, you have to PLAN stuff, like breakfast, lunch, and supper.  What to have?

Usually on Sundays I spend some time brainstorming what "sounds good" for meals for the next week.  Definitely having my blog helps because I can use the key words at the right of my blog to sort some easy ideas for things we have liked in the past.

I try to take my lunch every day.  I can probably count on one hand the amount of times I have bought lunch since I started at my new job a year ago.  In fact, the girls at work sometimes laugh at the stuff I bring.   Some of my old standby lunches are:


corndog muffins - (oooh baby, I loves those!)


homemade frozen burritos (so quick - much better made at home)
 
 
Sometimes I'm so LAZY and all I do is take two pieces of this
bread that I keep sliced in my freezer.  I toast it
and slather it in peanut butter = lunch!


I recently found another great recipe at Finding Joy in My Kitchen.  SnoWhite is always loaded with great recipes and inspiration.  I LOVE egg salad.  I grew up eating lots of egg salad.  My granny and my mom always made lunch for several people with not a lot of money.  One of the ways they avoided buying lunchmeat was making egg salad or tuna salad. 
 
I hadn't made egg salad in years when I saw SnoWhite's post here.  She made her egg salad using only three yolks and all the whites from six boiled eggs, a little olive oil mayo, some greek yogurt, and some seasonings.  Wow!  What a great idea.  It would be lots less cholesterol using only three yolks and by incorporating some yogurt instead of all mayo, that upped the healthfulness of it even more.
 
The egg salad I grew up eating was made with a little mustard and sweet relish so, of course, I added those to my version of SnoWhite's egg salad.
 
I ate my egg salad on two pieces of toasted french bread from the recipe above and it was so DELICIOUS!  Definitely I will be adding egg salad to my list of lunch options that I ponder and stew over on Sunday afternoons.
 
Also, lots of people have backyard chickens (remember Ringo?) these days.  Egg salad sandwiches would be a great way to use up some of those eggs! 


 Here's how I made Healthier Egg Salad AT HOME MY WAY:
 
 
Healthier Egg Salad

Ingredients: 
  • 6 hard boiled eggs
  • 2 T Plain Greek Yogurt (not vanilla)
  • 1 T Olive Oil Mayo
  • Dash of paprika
  • Pinch of salt & pepper
  • 1/4 teaspoon prepared mustard
  • 1 or 2 teaspoons sweet relish
Directions:

Boil eggs, peel and rinse.  Slice the boiled eggs in half, only use three of the yolks (removing yolks from the other three eggs - I gave mine to my sweet dog, Brandy).  Chop the egg whites/yolks.  Add the other ingredients and stir well.  Keep refrigerated.

(I halved this recipe with great success since I'm the only eater of egg salad at MY house!)


Enjoy!
 
Gina


Monday, April 15, 2013

Spring Salad


We barbecued burgers again this weekend.  My niece was in from out of state and we all wanted to get together to get a chance to visit with her (and each other!).  I took this delicious salad to the BBQ.  Every single thing was just so delicious!  After a long winter (that refuses to let go of us), BBQ just taste extra special and we can't get enough!  I first found this recipe at a great blog called The Prudent Homemaker.  Check it out HERE!

This salad can be used to incorporate your favorite seasonal fruit, like strawberries, apples, pears, oranges etc.  It features your favorite lettuce, green onions, sugared pecans, fruit and feta.  It's a delicious combination! I had mandarin oranges on hand and I particularly like the orange contrast next to the salad greens and feta so that is what I used on Sunday.  My mother-in-law commented that she could make a meal completely out of this salad alone.  I agreed!

It's so nice to remember these great recipes that often slip through the cracks.  With all of the beautiful, fresh and home grown lettuces and sweet onions available this time of year, this recipe will be making a regular appearance on my dinner table.

Here's how I made Spring Salad AT HOME MY WAY:


Spring Salad

Ingredients:
 
Mixed greens (torn/chopped) (I bought one of those little plastic tubs in the produce section that had several different small heads of green and purple lettuces.) 
2 green onions, chopped small
2 cans mandarin oranges (fully drained)
½ cup Sugared Pecans (recipe below)
Citrus Dressing (recipe below)
Feta Cheese (I used one tub, but for a whole, big salad, two tubs would be a plus.)
** You could also add dried cranberries, raisins, other nuts.

Mix first six ingredients in a large bowl.

Sugared Pecans:

2 Tbsp unsalted butter
2 Tbsp brown sugar

To make the sugared pecans, set a pan over medium heat. Add the butter and sugar. Once it has melted, toss in the pecans and continue to toss to coat and cook evenly, about 1 minute. Transfer to a sheet tray lined with waxed paper or a plate sprayed with cooking spray, to cool while you prepare the salad.

Citrus Dressing:
 
1/3 cup vegetable oil
1/3 cup apple cider vinegar
½ cup sugar
½ tsp dry mustard
1 Tbsp orange juice concentrate, or, the juice of one orange
salt and pepper to taste

 Whisk together all ingredients.

Instructions:  Combine the lettuce, onions, pecans, fruit, feta crumbles, and toss with dressing.

If you wish to keep leftovers, serve the dressing on the side for adding to each individual serving so that the salad itself will keep without getting too wet.

I shared this recipe at:


Wednesday, April 10, 2013

Canning - Zucchini "Pineapple"


Gardening season is fast approaching!  Hurray! 

There was a terrible drought in Missouri last summer so my garden was... should we say "pitiful" to say the least.  Of course, I'm always overly eager so I have added a few ideas to help my garden along.  I'm going to try burying 5-gallon buckets or 2/3 liter soda bottles with  my veges for deep root watering.  I'm also going to try adding a few vegetables and fruits in with my landscaping.  I have a few natural weed and bug killers to try since pinning on Pinterest has been my favorite weeknight lounging activity.

Along with making a garden plan this spring, I also like to make at least a mental list of the things I want to can from my garden.  I normally can pickles (like this delicious sweet pickle relish:


a special salsa recipe (which I will post soon); a favorite raspberry-beet jelly that is completely delicious filled in homemade donuts or topping Homemade Biscuits; green beans; tomato sauce for Homemade Spaghetti Sauce and Homemade Pizza; the now infamous "Just Like Clausen No-Can Pickles" (lots of pins on Pinterest):


and the recipe I am posting today for Zucchini "Pineapple". 

Most people have hoards of zucchini in their gardens.  I'm not one of those people.  I normally have to beg, plead, and barter zucchini and yellow squash since my garden suffers from an army of squash bugs and worse, the squash vine borer.  Not to be discouraged, I will be planting them again.  We love squash at our house in just about every form, summer squash or winter squash.  I'm not ready to give up... YET!

I made this batch of zucchini "pineapple" last summer.  It tastes amazingly like crushed pineapple and I use it in baked recipes like pineapple upsidedown cake, adding it to yellow cake mix for a crushed pineapple cake, quick breads, muffins, and of course, baked oatmeal.  Zucchini "pineapple" is just peeled and grated zucchini canned with sugar, pineapple juice, lemon juice, and a little yellow food coloring (if needed).  It's a fun way to preserve any overabundance of this typical Missouri garden vegetable.

Here's how I made Zucchini "Pineapple" AT HOME MY WAY:


Zucchini "Pineapple"
 
  • 4 quarts peeled and shredded zucchini
  • 46 oz canned unsweetened pineapple juice
  • 1 1/2 cups bottled lemon juice
  • 3 cups sugar
  • Yellow food color, if desired.
 
Instructions:
 
Sterilize jars/lids/rings (I use my dishwasher for this). (If you aren't familiar with canning instructions, HERE is a good link.)
 
Wash and peel zuchini,shred or grate.  Mix shredded/grated zucchini with the other ingredients in a large saucepan and bring to a boil.  Simmer 20 minutes, add a few drops of yellow food color if desired.  Fill hot jars with hot mixture and the cooking liquid, leaving 1/2 inch headspace in the jars.  Adjust lids and process in hot water bath 15 minutes.
 
Remove jars carefully and let cool, listening for the pop - seal.


Monday, April 8, 2013

Making Cherry Pie Filling


Yesterday (Sunday), it was such a beautiful spring day!  We put some burgers on the grill and spent lots of time outside.

I knew one thing I wanted to make was my new favorite Ditch the Box Cheesecake!  That recipe is my new go-to favorite dessert for potlucks and just for weeknight snacking.  It's just so incredible that I could go on and on!


While cleaning out my deep freezer recently, I discovered a treasured bag of frozen cherries that I had been given by a good friend.  My friend grew up on a farm in a small town closeby and she always brings home magnificent treasures when she visits her folks, like pitted cherries, apricots, and even stories like how her mom planted potatoes or onions.  She shares a wealth of information with me which I treasure since I grew up in the Sunshine State. Our childhood stories are very different to say the least!

I was especially thrilled to find this bag of cherries so I could try making some homemade cherry pie filling to go over my Ditch the Box Cheesecake

It turned out terrific!  It's easy and very quick to make. It just tastes ligher and fresher than canned pie filling.  I used  a small portion of it for topping my cheesecake and froze the rest for later. 

There are lots of reasons I liked making my own instead of buying it in a can.  My cherry pie filling comes from local, hand picked cherries.  I controlled the amount of sugar (I could have used less with good results) and there is no red dye in mine.

Did it taste like canned pie filling?  It SURE did, but 100 times better!  I have to to get a couple of cherries trees planted!

Here's how I made Homemade Cherry Pie filling AT HOME MY WAY:


Homemade Cherry Pie Filling
 
  • 4 cups of sour/tart cherries (pitted) (fresh or frozen)
  • 1 cup of sugar (1/4 cup for each 1-cup portion of cherries)
  • 2 Tablespoons cornstarch
  • 2/3 cup COLD water
Instructions:
 
 
Mix 2/3 cup COLD water with 2 Tablespoons cornstarch in a small cup and mix until smooth.
 
In a small pot, combine the cherries and sugar.  Stir well, bringing to a boil (stirring often).
 
Add the mixture of COLD water and cornstarch to the boiling pot of cherries/sugar.
 
Stirring constantly, cook until thick.
 
*If it doesn't thicken enough for your liking, simply add a little more cornstarch (1 teaspoon) to a small amount (3T) of COLD water in a small cup, mix until smooth, and add to the boiling cherry mixture.  Let it cook some more and it should thicken up nicely.

** Remember that it will thicken as it cools so you don't want it to be the perfect thickness in the hot stage. 
 
That's it!  Can you believe it?
 
Now, let it cool completely before using.   


Wednesday, April 3, 2013

Easy Pizza Sauce


Yesterday morning I mixed up a batch of 5 Minute a Day dough for my fridge before I left for work - planning to make Homemade Pizza for supper.  When we got home we ran out to my husband's mom's house for a little visit so we got home a little later than we usually do.  We could have grabbed a bite to eat somewhere but just knowing that delicious dough was in the refrigerator spurred me on to stay with the plan and make homemade pizza.  Once you try this dough for crust and make a pizza with it, pizzaria restaurants just don't seem as wonderful as they once have... because this pizza is just THE PIZZA! 

Sometimes I use store bought, jarred pizza sauce but unless I have several people to feed I tend to open the jar, make a pizza for me and Doug, and leave the rest languishing in the fridge to mold.  I hate being so wasteful!  I discovered not too long ago when I was making do instead of running to the store, that a cheapy little can of tomato sauce,  a little garlic powder and some dried oregano is all you really need for pizza sauce.  My husband really prefers this sauce on his pizza.  He likes tangy sauce instead of sweet sauce so this works great!  The extra plus, it's CHEAP!  I usually get those little 8 oz cans of tomato sauce at Aldi for around 30 cents.  One can will make two medium pizzas or one large and one small, with a little sauce leftover.  So... that's a no brainer!

Here's how I make homemade pizza with Easy Pizza Sauce AT HOME MY WAY:

Pizza with Easy ("cheap") Pizza Sauce
 
Ingredients:
  • Crust for pizza (I use a hunk of dough from my 5 Minute a Day dough)
  • 1 (8-ounce) can tomato sauce (generic is completely fine here)
  • Garlic Powder, dried Oregano
  • Cheese (I grate mozerella to avoid the "stuff" they put in bags of grated cheese to keep it from clumping)
  • Toppings (pepperoni, sandwich ham (which is just like canadian bacon, only cheaper), mushrooms, peppers, ...)
Directions:

Preheat oven to 400°. 

Spray your cookie sheet/pizza pan with cooking spray well.

Place a little flour on the disc of dough that you are using and start flattening it out (with your hand) on your cookie sheet.  Using a small rolling pin or thick glass (careful not to push too hard so that the glass would break), roll out the dough in the cookie sheet/pizza pan.  If it springs back, give it a few minutes to loosen up.  Keep rolling/pressing it out in the pan.

Spread some tomato sauce from the 8-ounce can on the crust. 

Sprinkle the sauce well with garlic powder (like you would "pepper" something), sprinkle well with oregano (a good sprinkling, not just a dabble).  I also sprinkle my sauce with canned parmesan cheese when we have some.  Sometimes I don't have any and I skip that.

Place grated cheese on your pizza.  Now add the toppings like pepperoni, ham, mushrooms.

Place the pizza in a PREHEATED oven set at 400° until the cheese melts and starts to brown and the crust edges start browning, probably 20 minutes or so, but use your judgment.  You want the pizza cheese starting to brown and the crust edges starting to brown although my cheese browns lots quicker than my crust edges and the bottom is still plenty crispy.

Loosen the baked pizza from the cookie sheet and place on a cutting board and slice it up!  We like squares when we use a rectangle cookie sheet for baking the pizza.

Now, look in your wallet because you just saved yourself about $10-$15 and the pizza isn't greasy or soggy and you feel good about eating it.  No greasy pizza, no soggy pizza, no weird toppings that you didn't ask for.  It's a complete win!

I know that pizza sauce only costs about $1.00 but if you use canned TOMATO sauce instead of pizza sauce, then you are using something that you might keep in your pantry for other cooking.  Not having to buy a special ingredient specifically for making pizza takes some of the effort and expense out of meal prep.


Tuesday, April 2, 2013

Homemade Pillowcases


I made some very special pillowcases a few weeks ago for a friend at work.  My friend's mom has been battling bone cancer.  She just found out that the battle will now include leukemia. 

When I heard this diagnosis, I was so sad for my friend.  It was about that time that I saw some beautiful pillowcases on Pinterest.  I was in the midst of a crochet phase and decided to drag out the sewing machine and see if I could do it.  I decided that I would make them for my friend's mom because if you have to be sick, you should get to lay your head on something pretty and cheery. 

I had a great time making these and my friend was so touched when I brought them in for her to give to her Mom.  It sure made my heart feel good to give them away and to know that they might bring my friend's mom just a little bit of comfort.

I thought this green and pink flowered fabric was about the cheeriest fabric I could find.  I love it!


This is the first "tester" pillowcase I made.  It turned out great but I wanted a finer yarn for the edging so that you could really see the detail of the crochet scallops:


I found a smaller yarn at Hobby Lobby for my second set of pillowcases (the green/pink ones).  This green edging is not made with the fine, string type thread that you make doilies out of, but is an all cotton "crochet thread".  I liked using it much better than the black stuff although the black yarn that I used does have a more homespun feel to it, which I liked.

You can really see the stitching in this picture.  Gorgeous, huh? 


The tutorial comes from a great blog called You Go Girl.  This is a great tutorial and the only thing I needed a little help with was the blanket stitch.  I just found a you tube for the blanket stitch to refresh my memory about how to start these stitches and I was on my way.

These pillowcases sew up fast!  They have a special little pocket that your pillow fits into so that you don't see your pillow inside the pillowcase.  Even if you don't want to crochet the edging, these are great pillowcases.  Great for special gifts or for brightening up your bedding.

I think you could also repurpose vintage sheets, skirts, or any other cool fabrics you stumble across. 

Here all of the steps (separate posts) of the tutorial at You Go Girl:

Step 1 - Ready to Rumble - week 1
Step 2 - Posh Pillowcase - week 2
Step 3 - Firm Foundation - week 3
Step 4 - Crochet like Crazy - week 4


I can't wait to make more of these.  Between the Casserole Carriers and these Homemade Pillowcases, the gifts I am giving just got a lot more meaningful and a lot more exciting, not to mention a little bit frugal for me!

I've been really trying to MAKE some of the great stuff that I PIN on Pinterest.  So far, I have a great start and I have some great stuff to show for it!

Let me know how you like them and if they work well for you.