
We woke up to another amazing amount of snow this morning. We knew it was coming, but... wow! Twice in six days we got snows totaling 10+ inches each. Thursday it was Storm "Q" and this morning (Tuesday), "Rocky" came to visit! This snow is so beautiful because there is so MUCH out there! It's not even very cold so you can really walk around and just breathe it all in! Everything in our area is pretty much closed, thankfully, so we are home today enjoying a much appreciated day off from work.
While Doug went out to shovel, I put on a pot of coffee and started some breakfast. This morning I made bacon and our favorite homemade biscuits. My favorite way to make bacon is to bake it on a broiler pan. There is no mess, no smoke, no burned spots on the bacon, and no burned ME from popping grease. It turns out perfect every single time. You also can pretty much cram it all on the broiler pan, stick it in the oven and walk away. No flipping bacon nor grease popping action going on.
This morning while the bacon was a-bakin', I opened the front door to give a "look-see" at the magnificent beauty that was outside. Wow!
This is what I saw:

I hadn't told Doug that I was making breakfast. But as I was standing there with the front door open, he looked up from his shovel with a huge smile on his face and said, "I SMELL BACON!" I had just earned gold stars!
Here's how I make Bakin' Bacon AT HOME MY WAY:
Baked Bacon
Ingredients and Utensils Needed:
- 1 package of bacon
- 1 broiler pan (which should have a deep bottom piece and a tray that sits on top with slits in it)
- 1 oven
Directions:
Turn on your oven to 400 degrees. Lay all of your bacon everywhere you can squeeze it over your broiler pan like this:


Put your broiler pan loaded with bacon in the oven (it is not necessary to preheat the oven - there is nothing to burn).
Bake until you see your bacon looking like you prefer. I like mine crispy. I don't remember how long this took. You don't have to flip the bacon. Just let it keep baking in there until it looks done.
This is how mine looked when I took it out of the oven (be careful because the grease will have drained into the bottom part of your broiler pan and could slosh out.):

Don't forget to save the bacon grease for frying chicken!
And here are some more peeks at this beautiful snow!
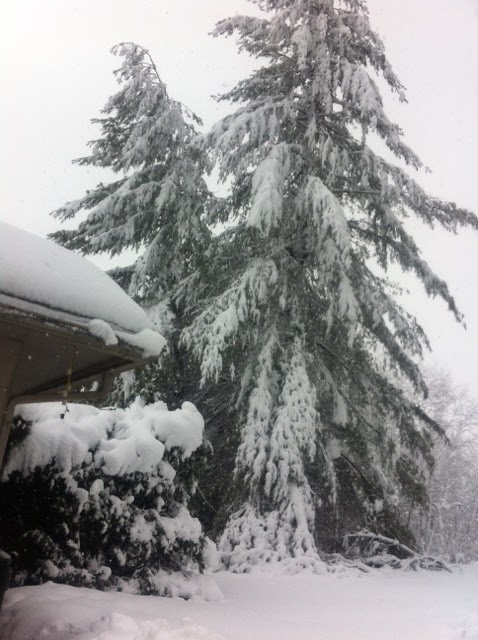
These pine trees are very precious to us! They were suffering this morning with all the weight of that snow!

This snow is so wet! It's like big piles of meringue!

Our deck!
Blizzards bring out the best in our kitchens!
I made this beautiful rainbow bread during another Missouri blizzard. What do you like to cook during bad weather?

Gina
So many comments on this post! First, Bakin' & Bacon was actually what I wanted to call my blog when I first started it. But I saw I wasn't the first one with that idea and I wanted to be original so I chose a different one, Recipe Rhapsody, which later became Veronica's Cornucopia. Also, the font on your picture (wenseslas) is the same font i used for my header! :) Third, I love bakin' my bacon but never thought to use the broiler pan to catch the grease! Duh! Thanks for the inspiration. Fourth, I love your snow pictures, that's how it looked in Wichita but now it's almost all melted. We broke our record for most snow, which was 20 inches in 1913--we got 21 but then got some more Tues night so it may be even higher than that. But I'm thankful the roads are clear now, even if that means it's not was white and pretty around here any more.
ReplyDeleteVeronica: Great to hear from you again! Cool coincidences too! Do-dee-do-do! LOL! We still have a TON of snow everywhere. Roofs are caving in and my mother-in-law hasn't had power since Monday night late. Crazy! We forget the little luxuries that we're all used to like a hot shower are just that, luxurious!
ReplyDeleteI was afraid you were getting it even worse than us in Kansas! It was a terrible storm, wasn't it?
We are still driving our truck to work (we also have a Civic) since some of the roads aren't so great just yet. Needless to say, ... I am ready for Spring.
The broiler pan just works perfectly! I think you have a little last bacon shrinkage when baking bacon as well. I'm sold anyway..
Thanks for commenting again! I've missed you!
Gina