
My Aunt Donna has made an Easter bunny cake for Easter dinner for as long as I can remember.
Since I miss my Florida family so very much, I decided to make a bunny cake myself so that I could feel a little closer to home!
You can make an Easter bunny cake with a cake mix and canned frosting or your own favorite cake/frosting recipe. I decided that since my family prefers chocolate cake and chocolate frosting, to make a completely all chocolate bunny cake. Pretty cute, huh?
I used my always good, stand-by Chocolate Mayonnaise Cake recipe found HERE. I used my homemade Chocolate frosting recipe also, recipe found HERE. (I added a little more powdered sugar to my frosting to make it a tad thicker - like 1/2 cup more powdered sugar than the recipe calls for) for making my cake.
Here's how I made our family's favorite Easter Bunny Cake AT HOME MY WAY:
Easter Bunny Cake
- Cake mix for a two layer cake, your favorite flavor and/or recipe
- Frosting for two layer cake, white or chocolate, or even tinted your favorite Easter color
- Decorations (I used Pull & Peel and jelly beans as well as coconut).
- Food Coloring (green for the "grass" and red for the "pink" in the ears.
- Cooking Spray
- A large foil covered board/cardboard (sturdy) for your assembled bunny cake (needs to be the length equal to three round pans since the ears stick out the length of a round cake pan).
Instructions:
Mix cake according to directions. Spray two round 8 or 9 inch cake pans well with cooking spray. Pour half of the cake batter in each pan.
Bake according to directions or until springs back and a knife comes out clean.
Let cool 5 minutes and then CAREFULLY remove to the foil covered board to finish cooling.
Cut one of the round pans into a shape like this, which forms the cake for the bow tie and the two ears:

I had removed the pieces before I remembered to take a picture, so I placed it all back together, but you get the idea.
Feel free to shape better to look like bow tie and bunny ears after you take the pieces apart.
Make sure the cake is completely cool and placed into the bunny shape BEFORE frosting:
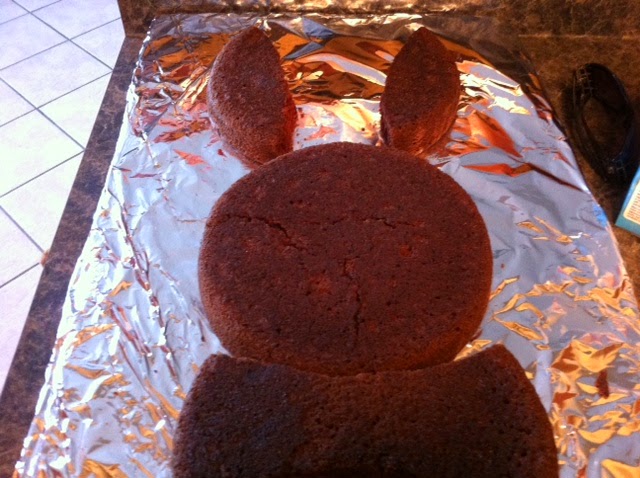
Notice the cracks in my cake. I texted my aunt because my cake was very wiggly and cracking after moving it to the board. My aunt said "Frost it anyway! No one will ever know that!" LOL.
Frost the bunny with your favorite frosting. Careful on the sides of the ears and bow tie because it will be crumbly. I whipped mine and just smeared it on gently. Try not to get too much on the foil. I had to wipe my foil a little after I finished frosting the cake.
*Tint coconut for inside ears like this:
Place a small amount of coconut in a small bowl. Add one drop of red food color and a little drop of milk. Stir until pink like you want.
*Tint the coconut for the "grass" the same way, a drop of green and a tiny drizzle of milk (like 1/4 teaspoon), stirring until green and gorgeous!
My aunt makes her bunny all white or a combination of white and chocolate frosting for her family. Here is my Aunt Donna's cake for Easter 2014. She covers her entire bunny in coconut, which I LOVE, but the rest of my family doesn't like coconut so I just put the pink coconut on mine in the center of the ears and sprinkled a little around for "grass". It looks like my aunt my uses fluffy white frosting (like seven minute frosting), which I also LOVE!

Make this part of your family's Easter tradition. I'm starting from 2014 on... I really wish I had always made this for my girls. Mr. or Mrs. Bunny will be a cheerful and delicious addition to your Easter meal.
Enjoy!
Gina
Gina, this would be a great contribution to Food on Friday: Easter Foods over at Carole's Chatter. Please do bring it over. Cheers
ReplyDelete