
I've been trying to cut down on the items that I buy that come in plastic containers. I read about BPA's possible links to cancer in an email article that I received from Rodale News HERE. I always lean to making my own instead of buying prepackaged, so this was just another reason for me to get down to basics.
One of the items that you can only buy in plastic unless you make your own is yogurt. It's so EASY to make! I've done it before but most recipes make a lot more yogurt than I can eat. I also wanted to make some so that I could play around with getting it to taste like I'm used to. (I'm used to prepackaged, sweetened, fruit on the bottom. My favorite is Dannon Fruit-on-the-Bottom, but it is so hard to find!)
Yes, I did have to start with a plastic cup of premade, plain yogurt, but after this first batch, I can use my own yogurt as the "starter" so this will be the last plastic cup of premade yogurt that I have to buy for a long while. I was only able to find a small container of greek style yogurt and it worked fine. Probably my yogurt tastes more like greek yogurt than regular yogurt but it's not super sour so I really like it! I either eat it with sweetened fruit or sweeten with some sugar and vanilla for a taste that I'm more accustomed to eating.
I found a recipe for making a small batch of yogurt which only uses one quart of milk. I had to try it. You should too! Jump on in!! It is thick and delicious, just like you buy in the store!
I don't use any fancy yogurt maker or anything. I do like to "proof" my yogurt in the same jars that I will store it in as, to me, that leaves a denser, thicker yogurt (less stirring and moving it to another container to break it down).
It will be easier for me to show you how I made Homemade Yogurt - AT HOME MY WAY:
Homemade Yogurt - Small Batch
Ingredients:
- 1 quart (4 cups) pasteurized (NOT "ultra-pasteurized") milk (ultra pasteurized milk will not work so look for a local dairy or one that doesn't come very far to get to your store) - I used organic, local milk that they sell in GLASS jars in the dairy section of my favorite small town grocery store)
- 1/4 cup powdered milk
- 1/4 cup plain yogurt (greek style or regular)
- 1 cooking thermometer
- 1 vessel for keeping the jars warm (I used my crockpot insert)
- a small towel to nestle the jars in the crockpot
- a big beach or bath towel to wrap the whole thing in
- 2 pint jars + 1 half pint jar, with lids
Directions:
I started with 2% milk and powdered milk like this:

Measure the milk (4 cups) and pour into a medium saucepan. Add the powered milk (1/4 cup). Mix well until dissolved:


Heat until the milk reaches 180 degrees (making sure not to touch the bottom of the pot with the thermometer to get an accurate reading), stirring occasionally so that nothing scorches:

Once this temperature is reached, remove the pot from the burner and place on a hotpad to cool until it reaches 110 degrees. This took, for me, about 30 minutes:

(If your milk is less than 110 degrees, heat it up just a bit until it again reaches 110 degrees.) Once the milk is at 110, add:
1/4 cup of plain yogurt (I measured it and didn't need this entire container. My lucky dog got the rest for a treat) (I had mine on the counter to bring to room temp so it wasn't so cold to add to the milk):

Stir, gently, to dissolve:

Pour into clean jars with lids. (Since you added 1/4 cup of powdered milk and 1/4 cup of plain yogurt to the one quart of milk, you now need more jars than equals one quart, so in addition to two pints (= to one quart), I also used one half-pint jar for):

Nestle a thick hand towel in a large pot (I used my crockpot insert) and place the jars inside:
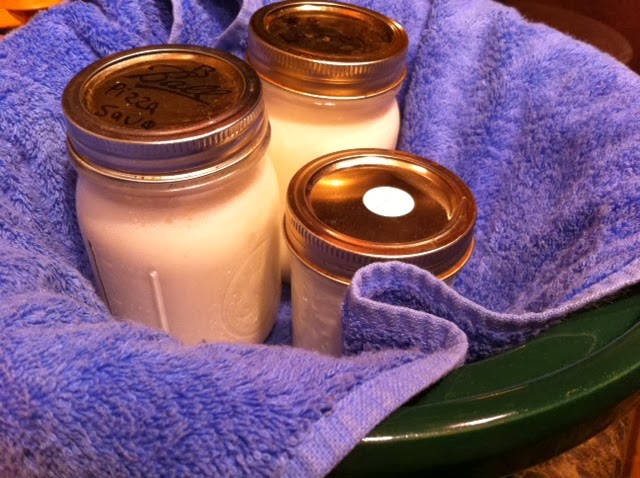
Cover with a lid and wrap the whole thing in a big towel (beach towel or bath towel).
Take the chill off your oven by simply turning on the oven for about 10 seconds, but then turn it OFF!! (MAKE SURE THE OVEN IS OFF!)
Place the wrapped pot inside, leave the light on so you don't forget this little package is inside there:

Let this sit in there for about five hours. After five hours, uncover and check your yogurt. If you tip the jars, the liquid should not move but should remain solid - your yogurt is done.
Mine looked like this:

Place in the refrigerator once it's all done. Mine lasts two or three weeks. I use it as yogurt and in place of sour cream in all baked dishes or salad dressings.
Of course, I also made some delicious Perfect Granola to serve with my yogurt:

I even used some of my friends' delicious, homegrown strawberries (from my freezer) for my breakfast:

Homemade yogurt, homemade granola, and homegrown berries. Mmmmm... life is good!
Enjoy!
Gina
This comment has been removed by the author.
ReplyDelete