Monday, December 7, 2020

Leftover Cranberry Sauce - Two Ways!

 Recipes at the Top!  Chat-chat at the bottom!


#1
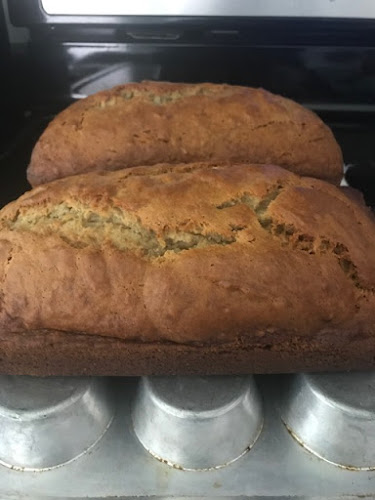
Surprise Muffins (Cranberry Sauce)


  • 2 cups all purpose flour
  • 1/3 cup sugar
  • 3 teaspoons baking POWDER
  • 1 teaspoon salt
  • 3/4 cup milk
  • 1 egg
  • 1/2 cup oil (I used vegetable oil)
  • Leftover cranberry sauce (about 1 cup)
  • Colored sugar/sprinkles if you have some
  • 12 cupcake papers or spray the pan well.

Instructions:

PREHEAT OVEN to 350 degrees and place liners in muffin tin (12)

COMBINE:  In a mixing bowl, combine all dry ingredients.

COMBINE SEPARATELY:  In a separate dish, add milk, oil and egg.  Blend well.

COMBINE:  Wet and dry ingredients and stir well to make a thick batter.

MUFFIN TIN:  Spoon one scoop (like 1 heaping Tablespoon) of batter in each cup of a 12-muffin tin.  Spread it around a little to cover the bottom of the cup.

ADD CRANBERRY SAUCE:  On top of the batter in each cup, add a Tablespoon of cranberry sauce to each cup.

TOP:  Top with another scoop of batter.

SPRINKLE:  If you have colored sugars or sprinkles, shake some on!

BAKE approximately 25 minutes at 350 degrees.


WAY #2

CRANBERRY FLUFF


  • 1 cup cranberry sauce (I used homemade- recipe HERE)
  • 2 cups prepared whipped cream (I used homemade-recipe HERE) but cool whip would be just perfect also
  • Optional:  Could add drained crushed pineapple, nuts like pecans or walnuts.  (I didn't use anything and it was just a piece of heaven!)

INSTRUCTIONS:

Combine roughly two parts whipping cream/cool whip to one part prepared cranberry sauce and stir it up.  Chill (or just eat from the bowl if no one is looking). 


*****

The Chit-Chat!

I rid my fridge of the last of the Thanksgiving leftovers yesterday with the precious bowl of Homemade Cranberry Sauce and a dish of Homemade Whipped Cream which I had left at my daughter's house.  I dearly love homemade cranberry sauce so I wasn't letting a single bit of THAT go to waste!  I make it with just cranberries, sugar, and water so no weird spices or fruit in it.  It's so yummy!  I've recently been inspired by a favorite frugal blog www.ThePrudentHomemaker.com) and I couldn't toss that cranberry sauce without making an effort at Remaking it into something wonderful.

First up - I made some Surprise Muffins with cranberry sauce in the centers.  They are delicious!  I often made these Surprise Muffins for my girls when they were growing up.  I typically add jam in the middle.  Our favorites are grape, apricot, and apple butter but I assumed cranberry sauce would be equally fantastic.  It really was even better than regular jam because the cranberry sauce held it's shape and really made a nice little surprise in the center!  These muffins were so yummy with my coffee Sunday morning and were even more moist and delicious leftover today!

After making the muffins Sunday morning, I still had a little Homemade Cranberry Sauce leftover.  I decided to simply combine the leftover cranberry sauce with some leftover Homemade Whipped Cream.  

Let me tell you, this combo is delicious!  The creamy sweet whipped cream combined with the tart fruity cranberry sauce just made a perfect little treat.  I was so glad I tried it because who really needs jello salads with tons of ingredients and lots of steps when you can just stir a few things together... like TWO things!  (Note to self to remember this next Thanksgiving.)  I could have added crushed pineapple and some nuts but I didn't have any and didn't want a big dessert in the fridge since I'm the only person eating it.  But definitely adding extras would make a little dabble of whipped cream and a little dabble of cranberry sauce go even further if you have a family to feed.

It's always nice to know you used every bit of something.  Tightwad success with these two dishes! LOL

Enjoy everyone!  


Gina


Monday, November 23, 2020

Crockpot Pineapple Pork Loin - Easy and So Delicious!


 RECIPE AT THE TOP! CHIT-CHAT AT THE BOTTOM!


Crockpot Pineapple Pork Loin


  • 2- 3 lb pork loin (not the same as pork roast or pork tenderloin)
  • 2 Tablespoons oil 
  • salt & pepper
  • 2 teaspoons garlic powder
  • 1/4 cup soy sauce
  • 1/2 cup brown sugar
  •  23.5 oz can chunk pineapple (not drained)
INSTRUCTIONS:

TRIM:  Trim the fat off as best you can from the pork loin

BROWN:  Brown the meat on all sides in a skillet before adding to the crockpot.  (Not absolutely required but makes makes a richer flavor.

ADD:  Add pork loin to the crockpot.

SPRINKLE:  Sprinkle with garlic powder and salt/pepper.

TOP:  Top with pineapple, the juice, and soy sauce.

SPREAD:  Spread brown sugar evenly over the pork loin.

COOK:  Cook on low 6-8 hours OR on high 4-5 hours until fork tender.

OPTIONAL:  You could thicken the juice (before serving) with a mixture of a little flour blended into cold water and stirred in, then heated to thicken (like for gravy).

SERVE:  I served mine with rice and mashed potatoes (because Big Daddy doesn't like rice) and steamed vegetables.

***


Hello everyone!  

I made a new to me recipe last night and since it was such a winner, I decided to post here for future reference.  I definitely will be making this again.  

Pineapple Pork Loin tastes very much like Hawaiian Chicken except it's a ton easier.  The combo of pineapple and soy sauce is just over the top wonderful.  Doug and I both loved it!  If you like pork and sweet, asian flavors, you're going to love it too.

Lately, my Gerbes / Dillons grocery has been having huge discounts on pork loin.  I found several for $1.29/lb.  Cannot beat that!  Pork loin is our favorite cut of pork and I like to keep a few in the freezer for meals like this, for slicing as pork chops, and for making our go-to Tangy Pulled Pork.  Pork loin is lean and that's a must have at our house.

If you are looking for a cozy Sunday Supper, or weeknight crockpot meal, try this Pineapple Pork Loin.  You will love it and will be adding it to your family favorites!


Enjoy!


Gina


Wednesday, November 11, 2020

Schoolhouse Vegetable Soup - Simple and Quick - Weeknight Supper!

 RECIPES AT THE TOP .  CHIT-CHAT AT THE BOTTOM!


Schoolhouse Vegetable Soup

  • 1 pound lean ground beef
  • 1 teaspoon onion powder
  • 1 teaspoon garlic powder
  • Salt & Pepper as desired
  • 28 oz diced tomatoes (not drained)
  • 1 3/4 cups frozen mixed vegetables (frozen - no need to thaw) (I use a 12 Oz bag of frozen mixed vegetables)
  • 1 cup frozen corn
  • 5 cups water
  • 3 beef bouillon cubes
  • 1 cup uncooked elbow macaroni

Instructions:

Brown ground beef in a soup pot.  Add salt, pepper, onion powder, and garlic powder while cooking the meat.  Drain if needed.

Add diced tomatoes including the juice in the can, frozen corn, and frozen mixed vegetables.  Add the water and beef bouillon cubes.  Stir.

Simmer about 15-20 minutes.  I used a lid to cover while cooking.

Next, add 1 cup uncooked macaroni.  Stir a bit.  (It tries to stick to the bottom of the pot until it starts to simmer so may need to stir a few times.)

Simmer approximately 15-20 minutes or until macaroni is done.

Serve with crackers, corn muffins, biscuits, or grilled cheese sandwiches. Oh yea!  


Hello everyone!

I have been craving vegetable soup!  And not stew, but rich brothy soup!  I made this last night for supper and it was perfect!  Absolutely wonderful!

I've seen a version of this recipe on pinterest lately and it just kept calling my name.  I had to try it.

I tweaked the original recipe just a tad by adding the frozen corn (which I love in vegetable soup because the homegrown taste of store bought frozen corn really adds something special) and the garlic powder (who can have soup without garlic?).

This recipe nailed it for me.  I told my husband last night that it reminded me of being in the cafeteria at school, lined up waiting on a steaming bowl of delicious vegetable soup.  Remember that one little packet of crackers you got and smashed until the cracker dust flew all over?  LOL.  Oh the days of fun in the cafeteria!

I wanted to "blog" this recipe so I would have it in the future.  

I have a few other vegetable soup recipes on my blog.  They are all delicious and have their own special  place at the table.  

Hamburger Soup (Spaghetti meets Vegetable Soup) is a family favorite!  Loaded with italian spices and heady with garlic.  Mmmm!

Homemade Alphabet Soup is my take on the canned favorite.  It uses no meat and is great for lunch packing!

And now this Schoolhouse Vegetable Soup!  It comes together speedy quick and can be made after work or school and served for a fast, weeknight supper.  It will  also be great for potlucks, family game night, and just making on Sunday for the week ahead.  

This is a keeper recipe at my house and I wanted to share it with you!


Enjoy!


Gina


Thursday, July 30, 2020

Potsy Garden 7-30-2020 & an Update


Potsy Garden Update 7-30-2020
&
Keeping Busy 


During the last few weeks of this crazy summer, I've been trying to stay busy.  For inspiration, I've been reading lots of blog posts and PINNING LOL.  Usually they inspire me with menu ideas, recipes, gardening knowledge.  I may or may not have also pinned about 10,000 ideas for rebuilding our house.  But... Doug isn't pinning and seems to be not very inspired about even making a plan for the new house.  Ah well.  What can ya say?  We are comfortable and there is no rush.  Plus, building supplies seem to be at a premium right now - so for now we will wait a little longer on that house rebuild thing.

One of the blogs I have recently been enjoying is Hickery Holler Farm Blog.  The Canned Quilter puts us all to shame as she works hard staying busy with lots of cooking, canning, baking, sewing, and gardening.  Her family is surely blessed!  I love to just scroll through the many glimpses of her life that she has shared.  I never fail to take away some knowledge or inspiration.  Please check out her blog!  It will be your new favorite, I'm sure!

My potsy garden is doing great!  Its growing like gangbusters and I'm getting a few things out of it.  


  • Early Girl tomatoes - I'm not a huge fan of these tomatoes but I'm getting several each day.  They just don't have a lot of taste.  Probably won't plant this kind next year.  Tomatoes should be juicy, red, and flavorful.  Ah well.  You learn something every time you do it.
  • Grape yellow tomatoes - These are doing great!  Slow to mature but I'm seeing more every day.
  • Beets - I planted a baby tomato plant in with  my beets and it seems to have stunted the beets.  Next year, they get their very own pot all summer!  I wanted to pickle beets and make Rasberry Beet Jelly.  Planting more for fall so I may be in the business yet this year!
  • Cucumbers - Not sure what kind I planted. They are good but are small and only have been getting a few a week.  Need more for Sweet Pickle Relish or dills.  We love pickles and I love the relish.  Sooo good on a BBQ hotdog!  
  • Yellow Squash - My squash plants are doing great!  I planted two in a small raised flower bed that I filled with homemade compost.  The squash are coming in fast now and I'm loving them!  I grew up eating so much yellow squash. See this mammoth? 

  • Watermelon - I have three babies!  I've never grown them before and planted them in the small, raised flower bed.  Vines are crawling everywhere!  Bring it on!  I'm ready for sweet watermelon any day now!
  • Cantaloupe - I have one nice big baby cantaloupe.  Awaiting it to ripen so I can try it out.  First time for me for growing this.
  • Pole Beans (greenbeans) - Lots of vines growing like crazy but blooms or beans yet.  
  • Carrots - I planted flowers in the pot with the carrots.  Oops.  They need their own pot.  I tore out the leggy flowers and planted more carrots.  We shall see about them later on this summer.
  • Zinnas - These do great in pots and make such nice cut flowers.  The more you cut them, the more they grow.  Who needs expensive garden center flowers when you can save your own seeds and plant more zinnias.  (The chamomile in this picture came from the overgrown field behind our yard.)

  • Dill - Did great in pots.  Will plant more next year.  I love the smell!  Nothing like it and I can use it for dips and pickles.

Fall Planting

I've got to get more things coming in and think I still have some time.  Since I have room after pulling some leggy flowers and some space in my tilled garden area, I planted more:
  • Beets
  • Zucchini
  • Yellow Squash
  • Pumpkins (for pie)
  • Cabbage (I have dreams of making sauerkraut... fingers crossed!)

Hickery Holler has also inspired me to get my freezers loaded for the winter.  Who knows what will happen with this virus.  I'm getting ready in case stuff gets serious around here.

  • Banana Bread - I used my Crockpot Tin Can Banana Bread recipe but baked in the oven in loaf pans until a knife came out clean when inserted into the middles.  I doubled my recipe and used six overripe bananas I had in the freezer.  I am eating one loaf for breakfasts and froze the other loaf.

Notice I discovered a muffin tin makes a 
great place to cool bread loaves.  :)

  • Zucchini Bread - No picture but I used Hickery Holler's recipe.  It made a large loaf and some muffins.  Good stuff!
  • Croutons - On grocery pickup day, I snipped all the stale bread and buns into croutons and baked until dry in the oven.  Doug will throw everything out if I don't get it done first.  I don't even use any oil or seasonings.  They are excellent plain and I can store it in the freezer and eat with soup or on salads.  Homemade Tomato Soup and Homemade Alphabet Soup are both great to store in the freezer. I can also use them for Homemade Stovetop Stuffing.  


For suppers, we are still eating "in".  I've not cooked so much since my girls were little and we were counting every penny.  LOL.  Some of our favorite meals lately were:

  • Quick Pizza Crust - I made a double batch of dough and made one pizza with mozzarella and pepperoni; the other with pepper jack / sharp cheddar cheese and triangles of lunchmeat ham.  Very good.  Caseys and Pizza Hut having got nothing on my homemade pizza!  If you can run a sink of hot dishwater, you can make this crust.


  • BBQ Burger Patties - We get pre-patted beef burgers from the local meat/butcher shop.  We love them leftover for lunches as well as for supper.
  • Italian Marinated Chicken w/ mashed potatoes, corn, and hoecake biscuit.  (Recipe coming soon for the chicken because we love it!)
  • Southern Stewed Squash & Onions - This is a huge family favorite!  Of course, Doug wouldn't eat it if his life depended on it.  I'll post the recipe soon.  Yes, mine has seeds.  I don't mind the seeds and even somewhat overgrown squash turned out fine in this dish.  I make a huge batch once a week and eat on it all week w/ different main dish items.  Squash is the one thing my family ate in Florida all.the.time.  We rarely had canned vegetables.  Mostly it was stewed squash, fried squash, fried okra, stewed tomatoes, sliced tomatoes, rice, big limas.  Stuff like that. 

  • Tacos w/ Spanish Rice - I just add 1/2 cup of salsa to my long grain rice (parboiled  cooking instructions on the bag.  It makes perfect Spanish Rice.  I'll eat it leftover until it's completely gone.

  • Spaghetti Sundays! One Sunday, both of my girls and I were all three making Spaghetti Sunday.  We each make homemade sauce, tweaked our own way using ground beef usually.  Sometimes meatballs, sometimes not, but always yummy and after a day of swimming makes the whole house smell good!


For snacks and desserts, I've made lots of cookies and a few other things like:

  • Super Simple Vanilla Ice Cream - I made for Doug's birthday.  good stuff and I used my little Cuisinart tabletop ice cream maker.  Rachel gave us hers and it's such a treat.

  • Frozen Bananas - Great for cold treats that prolong your snacking enjoyment.  I use overripe bananas, freeze on a plate, and store in a large baggy.

  • Homemade Chocolate Pudding - I had mine ladled over a hoecake biscuit.  Cause, who has hot, chocolate pudding without serving it as "Puddin' & Biscuits"?

I am extremely blessed during this crazy time to be enjoying warm summer days filled with time on the patio sharing talks, laughs, and a few tears with my sweetie, time in the garden babying my plants, caring for a wild kitty who is letting us win him over, and preparing delicious food from my stocked pantry.

Take care y'all!


Gina

Wednesday, July 15, 2020

Canning Strawberry Jam: Step-by-Step Instructions


RECIPES AT THE TOP:  CHIT-CHAT AT THE BOTTOM. (But read the step-by-step instructions completely if you are a canning beginner. Surejell requires a certain order to things for it to work.)


STRAWBERRY JAM USING SUREJELL POWDER PECTIN

  • 5 cups mashed (stems removed) fresh strawberries (approximately 3 pounds whole strawberries made 5 cups for me; measure them mashed)
  • 7 cups granulated sugar
  • 1/2 Tablespoon butter/margarine (optional) (helps a little with foaming)
  • 1 box powdered original Surejell pectin 
  • 10 (8 oz) canning jars w/ lids & rings (new lids/rings)
Instructions:

*Step-by-Step instructions listed in the chit-chat below - WITH LOTS OF PICTURES!

Place mashed strawberries in a large pot (like for cooking chili).  Sprinkle w/ powdered pectin (only Surejell works for me.)  Stir to blend.  

Measure 7 cups granulated sugar into a separate container (bowl) and have ready to go.  Don't add it yet to the strawberries in the pot!

Heat strawberry/pectin mixture to boiling, stirring super often.  Once boiling at a "full rolling boil" that doesn't stop, time 1 minute.  

Dump all sugar in at once.  Stir well.  Heat to boiling stirring nearly continuously.  Watch for a hard boil.  Time 1 minute after "full rolling boil" is in action.

After this 1 minute is up, remove the pot from the burner to stop the cooking process.

Ladle into sterilized jars.  Clean jar rims with a clean, wet cloth & add lids/rings - hand tightened.  Not super duper tight.

Hot water bath in a canner (water over the upright jars by 1-2 inches) 10 minutes.

***

Back in the DAY, my girls used to help me do canning projects all the time. Well, now they are grown.  One of my girls recently wanted to try canning jam on her own.  She lives a few hours away and with this dang virus raging, I can't be there with her to boss her through this process.  Blogging to the rescue!

Disclaimer:  I am not a pro at home canning.  You should always consult your local extension or USDA sites for official canning safety guidelines.  I try to practice all official safety measures, but wanted to link here for any beginners.  Please read about canning fruit jam to get the basics before trying any recipes.  Here is the link to making jam using pectin found at the National Center for Home Food Preservation.  

Timing is everything with cooking in general so I wanted to document my process here in case there are any other beginners who, after reading the above link, want to see how I can jam AT HOME MY WAY.

First thing out of the gate is that I ONLY use Surejell powdered canning pectin.  I am not being paid to say that.  I have used other pectin products and had bad results.  Canning jam is too much work to have it not set up.  I have used the low sugar Surejell and while it did use less sugar, it wasn't the taste I was after.  It is more like dense fruit and just didn't taste like jam to me.

Strawberries have been a great price for me right now (July).  I've seen strawberries at around $1.00 per pound.  I decided to splurge and bought organic strawberries at $2.00 per pound (at my local Walmart).

My below post will include a ka-zillion pics -but when newbies want to do canning without their mentors, they will want to have something to see.  No one wants all of that work and then to end up with strawberry juice. 

Here we go!


Canning:  Strawberry Jam

What you need:


Three packages of 1-lb strawberries = 3 lbs fresh (not frozen) strawberries


One box SureJell Original Fruit Pectin (powder)

You need lots of sugar (7 cups) to make jam - 
so get a new bag.


Equipment needed:


You need at least 10 jars w/ lids & rings to be safe.  
(Don't want to run out of jars and have jam left so make sure you have 10 jars ready to go.)


Canning Pot (21.5 Quart) w/ rack

Canning Tongs (absolute - must have item)

Canning Funnel (absolute - must have item)


Things you need but probably have at home:

  • Cooking Pot (like you might make  pot of chili in)
  • Potato Masher (for mashing the berries or a blender)
  • Long spoon for stirring (I use a wooden one.)
  • Ladle - for dipping jam into jars.
  • Large Towel, dishcloths, potholders
  • Dishwasher for sterilizing jars - or can boil them w/ lids in the canner

LETS GET THIS PARTY STARTED!  

  • OPEN the Surejell box and READ the instructions.    Surejell requires you follow the instructions to a T or it will not work.  If you add sugar in the wrong order, it will not work.  READ THE INSTRUCTIONS AGAIN.  (I know this BECAUSE?  :) yea.... )

  • Sterilize jars, lids, and rings in the dishwasher.
    • I place a colander on my dishwasher's top rack to hold the lids and rings to run in the dishwasher.  Looks like this:


  • WHILE the dishwasher is running, I wash my berries, and remove the stems/slice.  If they have been refrigerated, let them come to room temp.  They will mash easier at room temp.


  • AFTER the dishwasher is done. Keep the door shut to keep the jars hot.  Don't start the jam until the dishwasher cycle is complete and the jars are ready.


  • MASH the berries some more.  Try to mash the heck out of them.


  • MEASURE the berries into the cooking pot.  
  • You need 5 cups of MASHED berries.  Don't measure until they are mashed well.  (Burner is off at this point.)


  • SPRINKLE the mashed/measured berries in the pot with the Surejell powder.  Add 1/2 teaspoon butter/margarine.  This helps with foaming.  Not a biggy if you don't have any butter/margarine.  POT IS OFF STILL AT THIS POINT.


  • MEASURE the sugar in a SEPARATE BOWL.  (NOT in the pot with the berries.)  Carefully count the cups.  You need exactly 7 cups of granulated sugar IN A SEPARATE BOWL.


  • Turn your burner on.  Stir OFTEN.  You want the pot to heat to a full rolling boil.  That means when you stir the berries at boiling, the boiling continues and doesn't stop.  You should see lots of bubbles from the boiling.  Stir often because these precious berries will stick.


  • START timing:  Time 1 minute exactly at boiling.

  • AFTER 1 MINUTE:  DUMP in the sugar all at once.  STIR right away because sticking is a possibility.

  • KEEP COOKING and BRING TO FULL ROLLING BOIL again.  You want the sugar, fruit & pectin to resume to boiling.  STIR OFTEN.  

  • START TIMING 1 MINUTE AT A FULL ROLLING BOIL that doesn't stop when stirred.  

  • The jam should start to look shiny and start to get a little foam on it after this 1 minute cooking time.  


  • SHUT HER DOWN and REMOVE THE POT from the hot burner to a surface safe for a hot pot.  I use my off back burner.  Stir some more to make sure nothing is sticking.  This stuff is hot so be careful!

  • REMOVE hot jars, lids and rings carefully from the dishwasher onto some newspaper or a towel.  Dry the lids and rings with a clean towel.

  • Get your canning funnel out and move closer to your pot.  Right now I'm living in a tiny house and don't have a canning funnel.  It was tough canning without my normal equipment.  Using a canning funnel helps you get the jam ladled into the jars without making a huge mess.  

  • LADLE hot jam into hot jars just up to the bottom threads on jar.  Wipe the tops of the jars with a wet cloth and add lids and rings.  Not super tight.  Just hand tighten.


  • Place rack in canner and place the sealed jars of jam in the pot/rack.  The jars should be almost touching - not falling over. Must be upright.  (In this tiny house, I do not have a canner so used a tall pot with a thick towel in the bottom of my pot. Jars that sit right on the bottom touching a hot burner are likely to burst.  ASK me how I know this?  I really recommend using official canning equipment, however, especially for newbies.

  • WATER BATH:  Add some tap hot water to the canning pot of jars and place the pot on a burner.  About half full.

  • ADD remaining water needed to cover the jars by at least an inch or two.  I use a pitcher to do this.


  • Cover the canning pot with the lid and heat the water to boiling.TIME the FULL BOIL 10 minutes.  (Don't start timing at the first bubble.  Let it come to a good boil first.  Water may splash out on your stove.  It's ok. This helps clean off the sticky jam mess and I know you made one!)


  • TURN OFF the pot after 10 minutes of boiling.  

  • AFTER boiling stops, using the canning tongs, REMOVE the jars to a thick towel to cool, sitting upright.  Let them sit a few hours.  You should hear some pings as the jars seal over the next few hours.  
Note in this picture, the jar with plastic lid is not water bath canned. I always fill my last jar for my own refrigerator.  I put as much jam as I have left after filling my jars (which might not fill another jar completely or if I have run out of sterilized jars) into this jar for my own use.  I don't water bath this jar of jam.  I literally let it cool and keep it in the fridge.  


YOU DID IT!  You canned strawberry jam!  Write what they are and the date w/ a permanent marker on the lids. Now take some pics and start sharing these jewels on Facebook.  No - don't because you might have to share.  DO at least text some pics to your mom.


ENJOY!


Gina/ Mom